A protective style has one job: to give your hair a rest from daily handling. Braids, twists, cornrows and updos tuck the ends away and keep the hair from being combed, brushed and heat-styled every day. That is the idea, at least. A style is not protective simply because it looks like one — a style that is too tight, too heavy or left in too long can do more harm than the daily handling it was meant to replace.
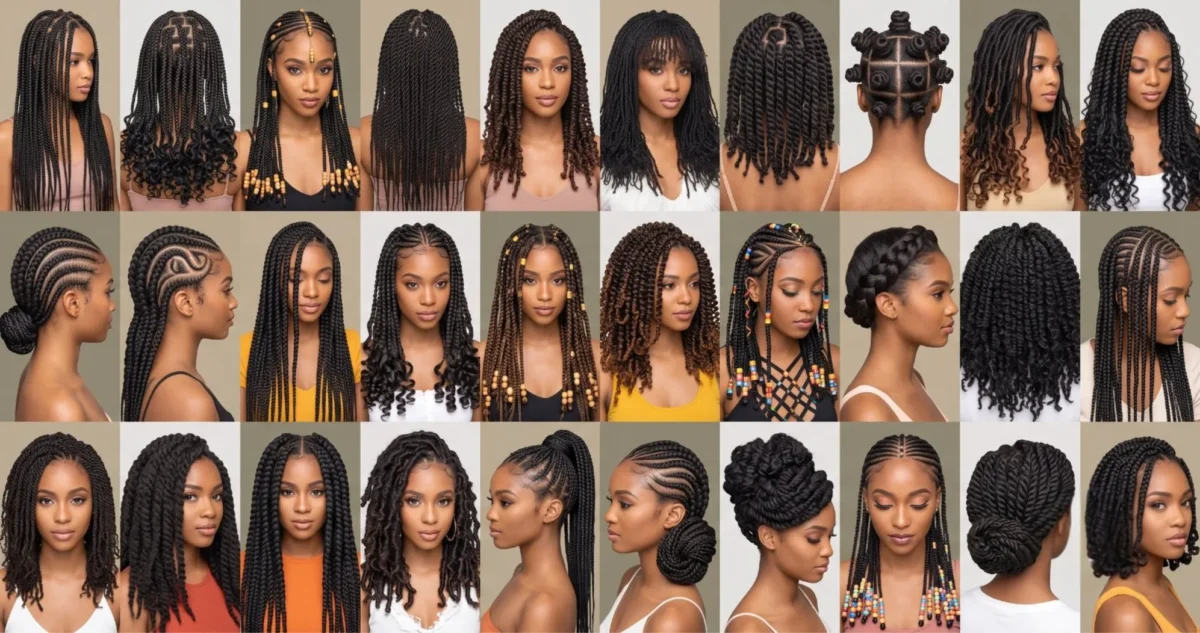
The photos in this list show thirty styles that can work, from simple two-strand twists you can do at home to box braids and faux locs best left to a braider. Look at the size of the sections, the weight of the added hair and how the style sits at the hairline, since those are the places where a style stops being protective. A lighter, shorter style that you can wash and dry properly will protect your hair better than a very long, heavy one that stays wet underneath.
Before you choose, be honest about your hair and your patience. If your edges are already thin or tender, tell your braider and choose a style with no tension at the hairline. Ask how long the style should stay in and how it comes out, and plan for a wash and deep condition in between styles. A protective style should feel comfortable from day one — pain is not part of the bargain.
Compare the whole installation
- Natural-hair twists and flat-twist updos differ from styles that add substantial extension weight.
- A shorter, lighter arrangement may be easier to manage than a very long reference with the same part pattern.
- A scalp design must still leave a workable plan for cleaning and drying. Appearance alone does not establish comfort or suitability.
Ask about tension and removal
Tell the stylist if an area feels painful or pulls, and ask for it to be adjusted. The American Academy of Dermatology explains that repeated pulling from hairstyles can contribute to hair loss; see its guidance on hairstyles that pull. Discuss how the style will be cleaned, dried and removed before installation. Do not use an arbitrary wear-time target as a reason to keep a style that has become uncomfortable or difficult to maintain.
How to choose a protective style that actually protects
Start with the install. The person doing the work matters more than the style itself, especially for braids, locs and anything with added hair. A professional braider will section the hair evenly, keep the tension comfortable and tell you honestly whether your hair can take the weight. If you are installing yourself, keep the sections small and even and stop if anything hurts: a style that pulls at the hairline is not protective at all, and repeated pulling at the edges is the most common way these styles cause damage.
Then think about weight and time. Shorter, lighter styles are almost always kinder to the hair: they put less pull on the roots and dry properly after washing, which matters more than most people realise. Very long or heavy installs that stay damp underneath can lead to itching, breakage and an unhappy scalp. Most styles are best kept in for four to six weeks, and the hair should be washed and deep-conditioned between installs rather than going straight from one set to the next without a break.
Moisturise while the style is in. A leave-in conditioner and a light oil through the braids or twists keep the hair from drying out, and a silk or satin scarf at night stops the edges from rubbing against the pillow. When the style comes out, take your time: undo it section by section, detangle gently and wash before you install anything new. If a style has left bumps, soreness or a thinned hairline, give the hair a break and see a professional before braiding again.
Classic Box Braids For Natural Hair
Medium-width braids stretch past the waist in clean rows from a crisp center part, with baby hairs laid smooth at the edges. Glossy jet-black extensions give this look a uniform, swinging length. They usually last 4–8 weeks, but take them out sooner if you notice tension or build-up, and wrap them in a satin scarf at night.
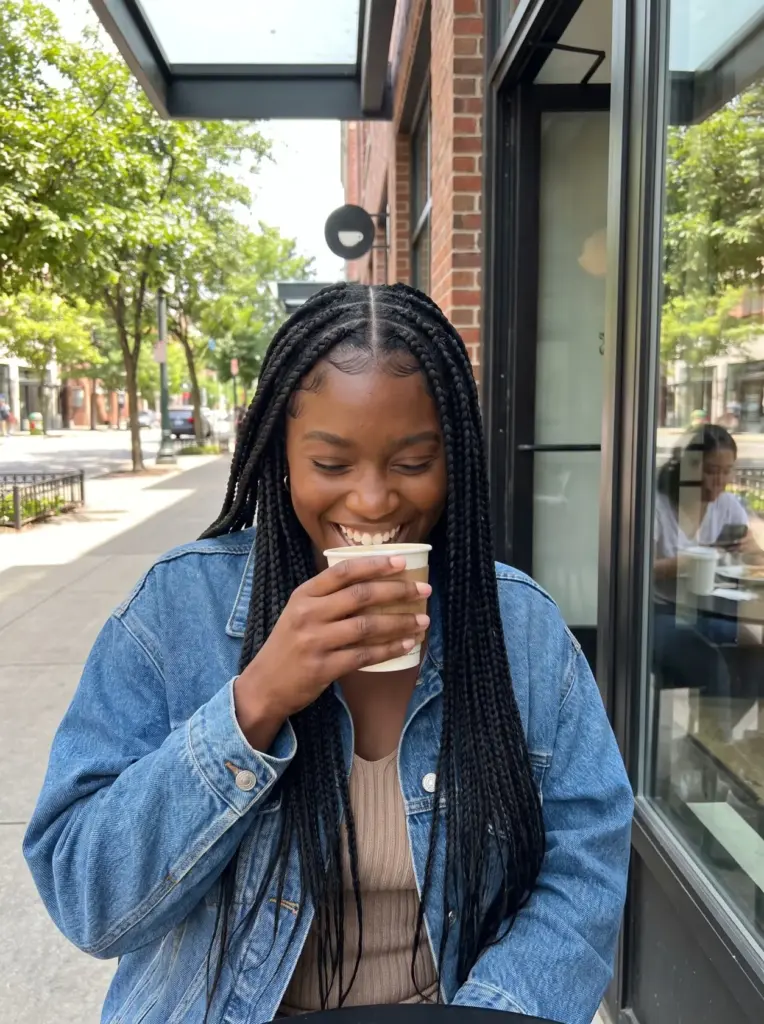
Knotless Braids With Curly Ends
Flat at the root and light on the scalp, these braids stop at the shoulders and taper into loose, wispy curls. Each section of this look is evenly spaced across 4C hair, shown in a natural black. A knotless installation can reduce bulk at the roots, but it can still pull at the hairline if sections are too tight or extensions too heavy. Tell your braider immediately if you feel pain; use a suitable lightweight styler on the loose curls.
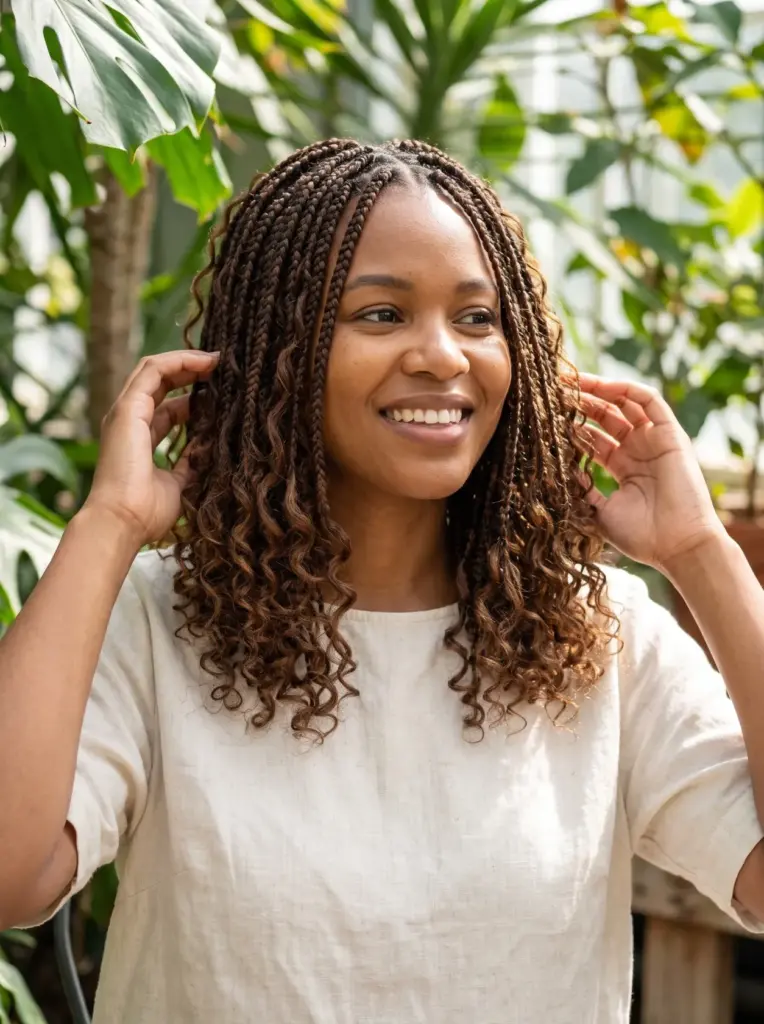
Fulani Braids With Gold Beads
Down the middle of the head runs a single braid, while thin cornrows sweep out into long box braids at the sides. Small gold cuffs and wooden beads swing along the temples of this look, set against a deep black base. The centre braid makes the parting pattern prominent. Place beads where they will not catch on earrings or clothing, and check that their weight does not pull at the temples.
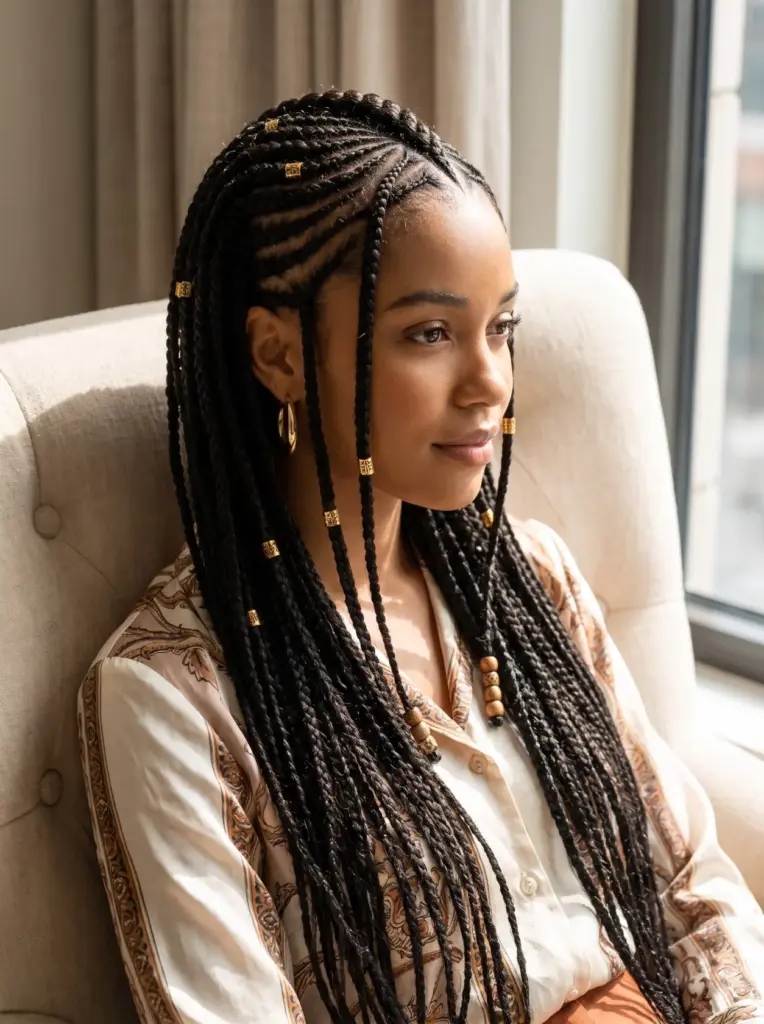
Senegalese Twists For Natural Hair
Rope-like twists fall in smooth coils to mid-back, even in width with a glossy finish from a defined side part. Shown in off-black, the twists may feel lighter or heavier depending on the extension material and how much hair is installed. Ask your braider to seal the ends safely; hot-water sealing can cause burns and is not appropriate for every fibre.
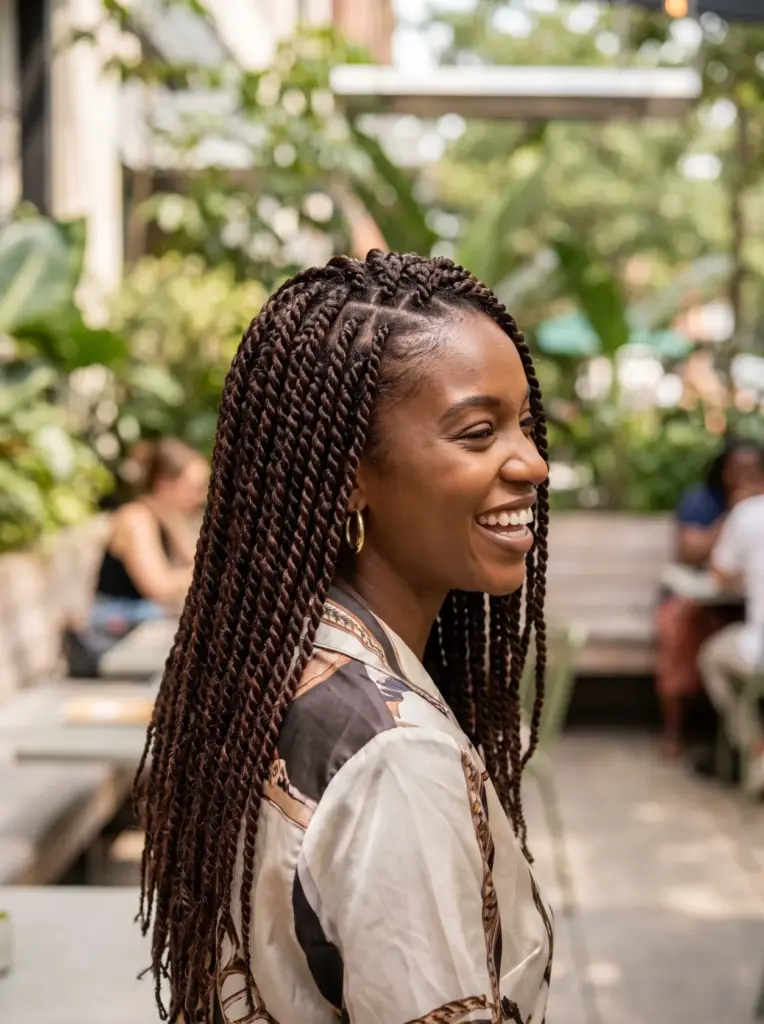
Passion Twists For Voluminous Curls
Curly-ended twists graze the collarbone, slightly frizzed along each strand and full at the crown. This look brings a bohemian look in a warm dark brown with honey pieces near the face. They usually hold for 4–6 weeks, though tension or build-up means taking them down sooner, and a weekly mousse rinse keeps the curls springy.
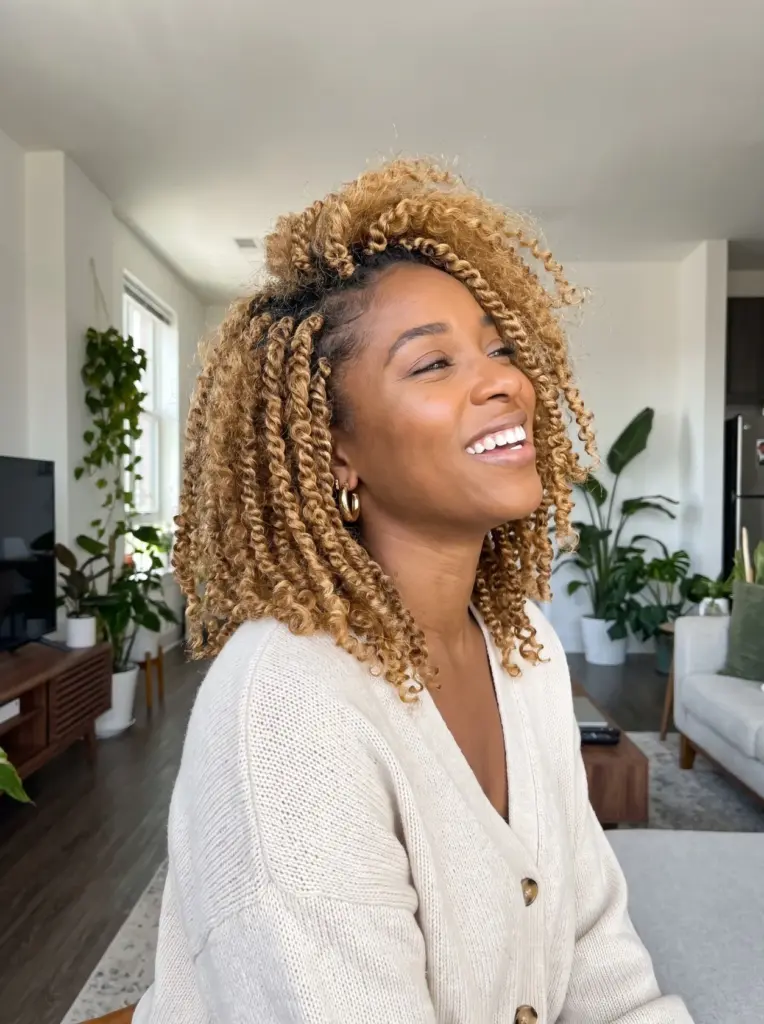
Micro Twists For Delicate Detail
Pencil-thin twists cover the scalp in dense rows from a precise center part, tapering into a feathery fringe at the forehead. Hundreds of strands make this style looks intricate, shown in soft black. Installation can take eight hours or more, and the twists usually last 6–8 weeks, or less if you notice tension or build-up at the roots.
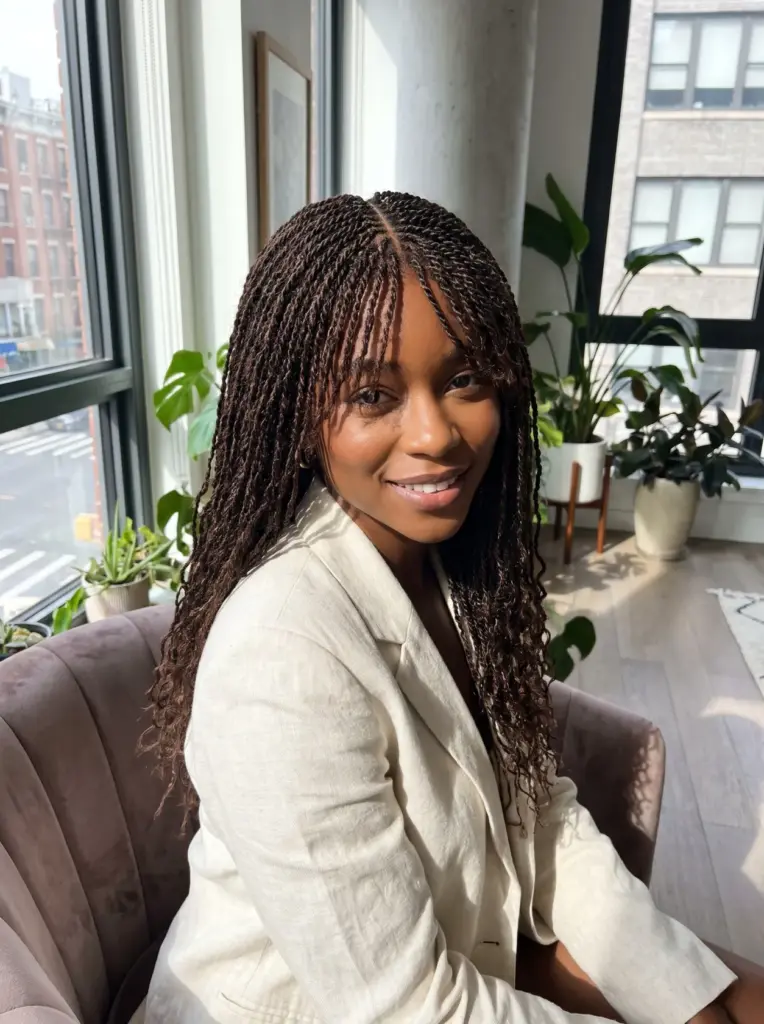
Two-Strand Twists For Natural Texture
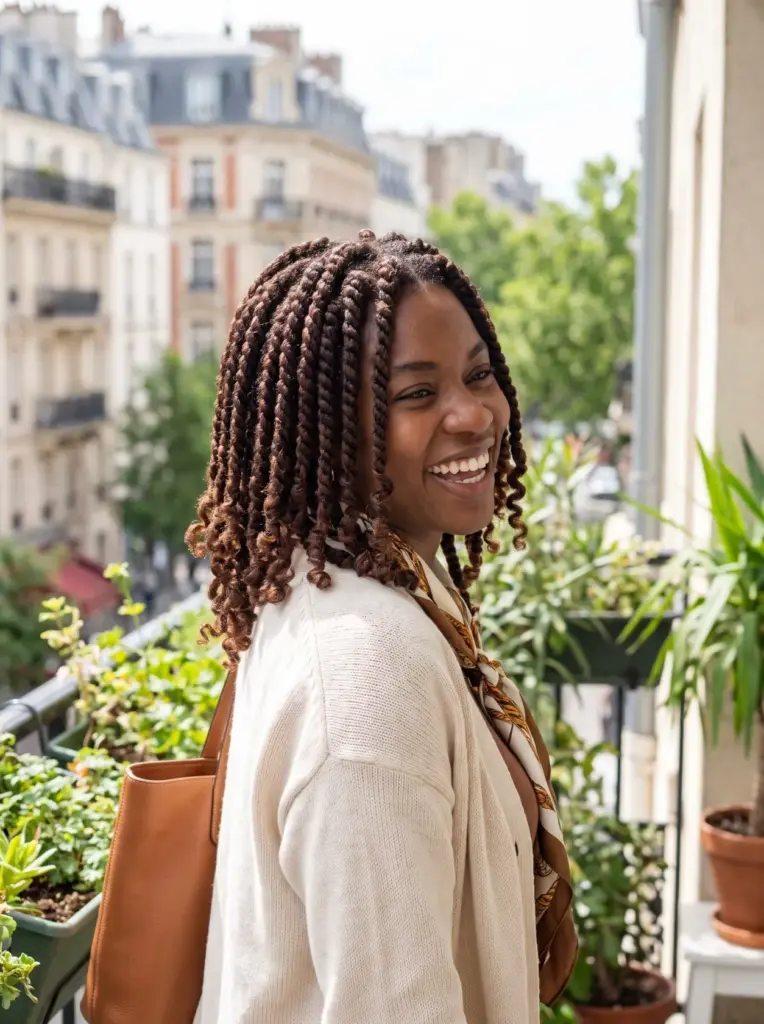
Chunky twists sit close to shoulder length in springy coils with a light sheen, and loosened tips curl near the jaw. Worn on the wearer’s own hair, this look shows a deep brown shade with no extensions. Twist on damp hair with a curl cream, and unravel them after a week for a defined twist-out.
Bantu Knots For Defined Curls
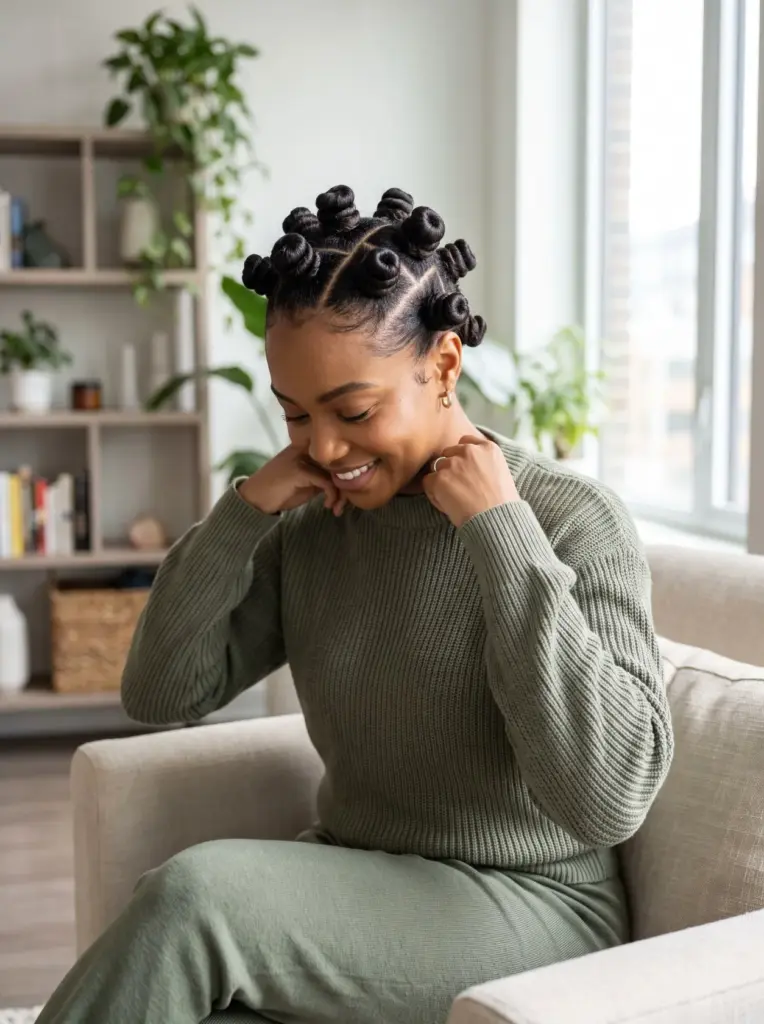
Neat rows of small spirals coil across the scalp along a grid-like part pattern, each knot tight and evenly sized. This look makes a bold, symmetrical style in jet black that doubles as a heatless set. Take them down after two or three days to reveal springy curls, and sleep on a silk pillowcase to keep the knots intact.
Faux Locs With Soft Curly Ends
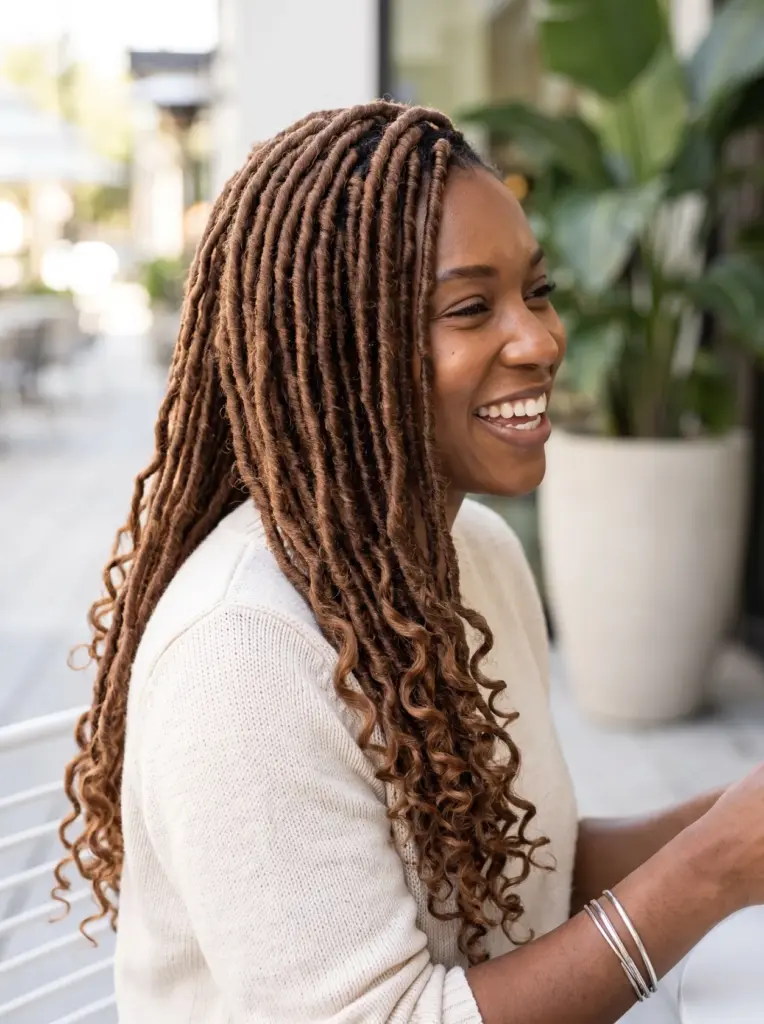
Matte, medium-width locs run past the shoulders with a subtle wrap pattern along each strand. Finishing in loose curls around the face, this look comes in a dark brown that blends into black roots. Shoulder to mid-back length keeps the weight manageable, and a scalp spray with tea tree oil soothes itching between washes.
Goddess Braids For A Romantic Look
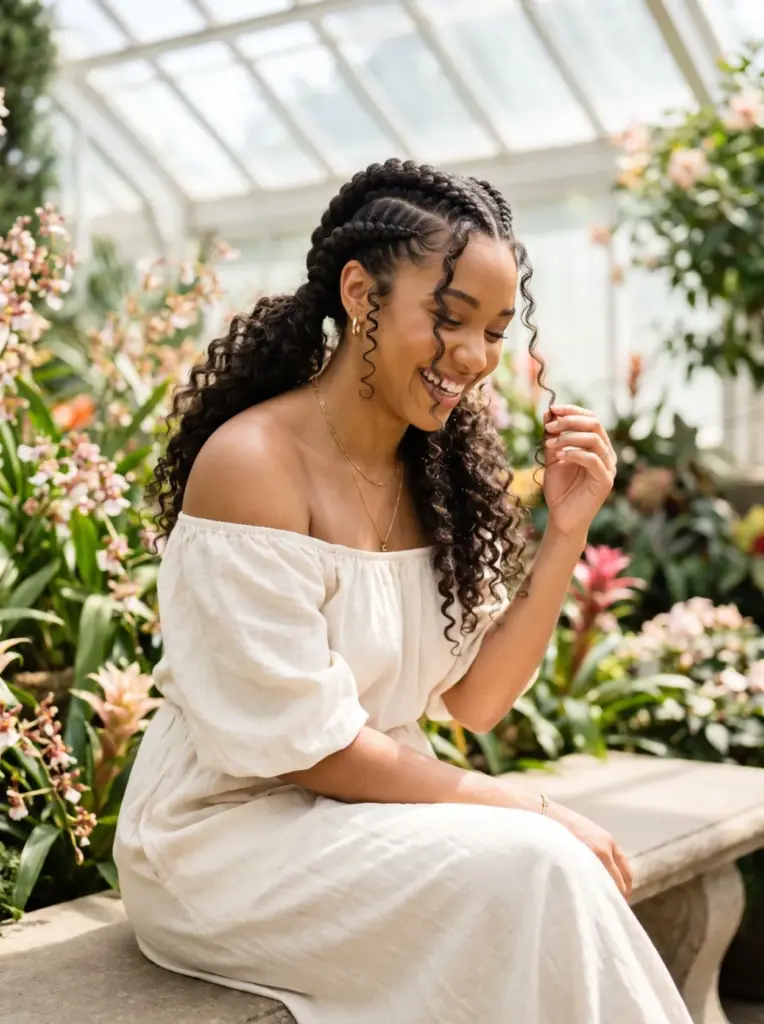
Raised braids sweep straight back from the hairline in a cornrow pattern, then turn into curly braided lengths falling past the shoulders. Loose face-framing pieces curl around the cheeks of This look, shown in a deep chestnut.
Cornrows Styled Into A Low Bun
Symmetrical parts guide sleek rows back from the hairline into a smooth bun at the nape, with a few tendrils curled at the temples. Shown in jet black, this look works for both office days and evenings out. Edge control along the hairline sharpens the parts, and the cornrows usually stay neat for 2–3 weeks, though tension at the edges means taking them out sooner.

Stitch Braids With Curved Parts
S-shaped rows curve across the scalp, each braid raised, glossy, and marked with even horizontal stitches. This look flows from the graphic root pattern into longer braids past the shoulders in off-black. Ask for six to ten rows for a clean pattern, and cover the hair with a satin bonnet to protect the stitched texture.
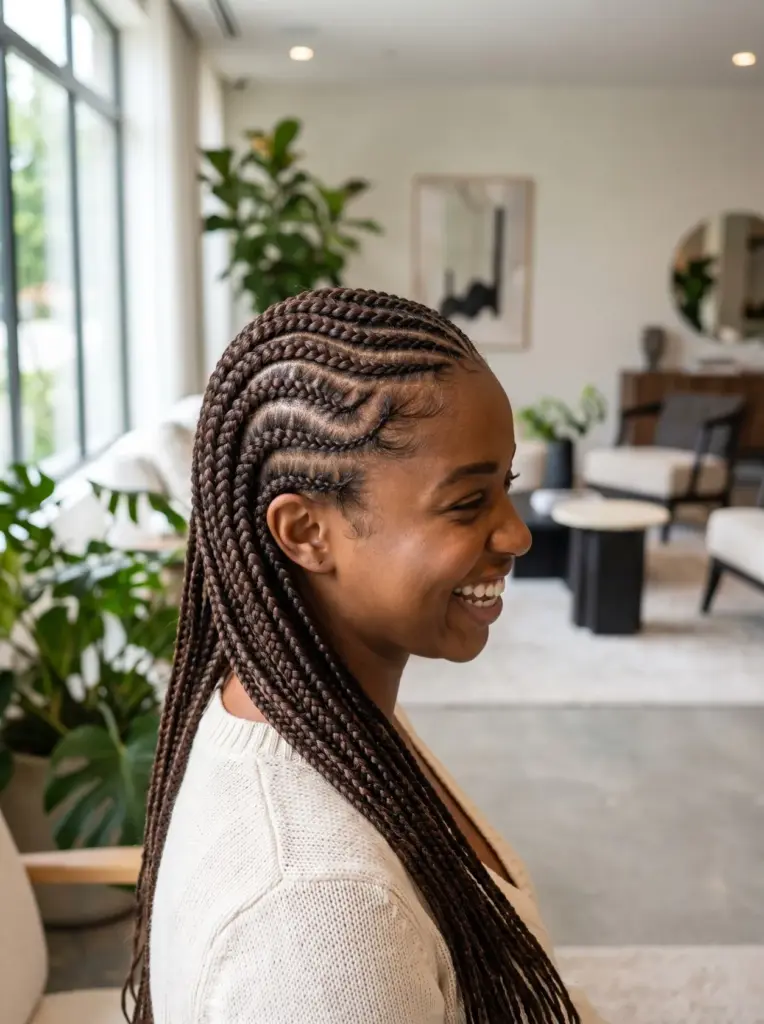
Ghana Braids With Statement Length
Bold raised rows fan out from a center part and taper toward glossy, waist-length braided ends. This look sway across the shoulders in jet black, with edges laid smooth at the hairline. The added length means extra weight, so ask your braider to keep tension light at the front.
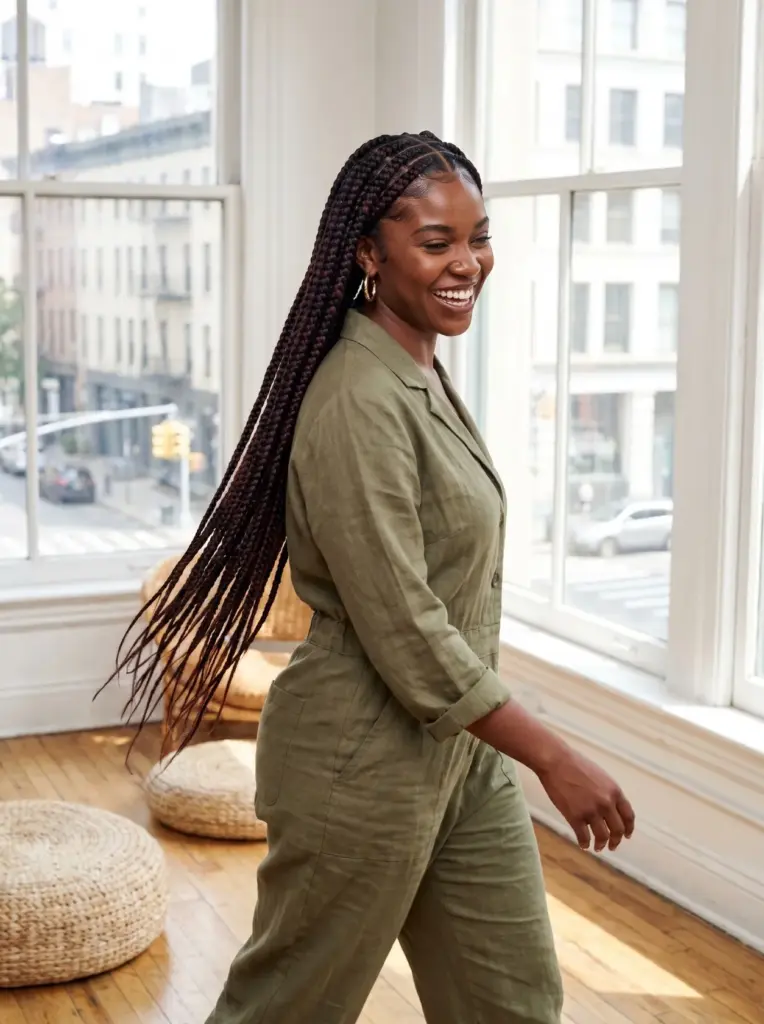
French Curl Braids For Softness
Mid-back box braids finish in spiraled curls instead of straight ends, adding bounce around the shoulders and neckline. This look pairs sleek braided roots with loose tips in a dark brown with honey blonde ends. Rinse the curls with a mousse-and-water mix to refresh them, and avoid heavy oils that weigh the spirals down.
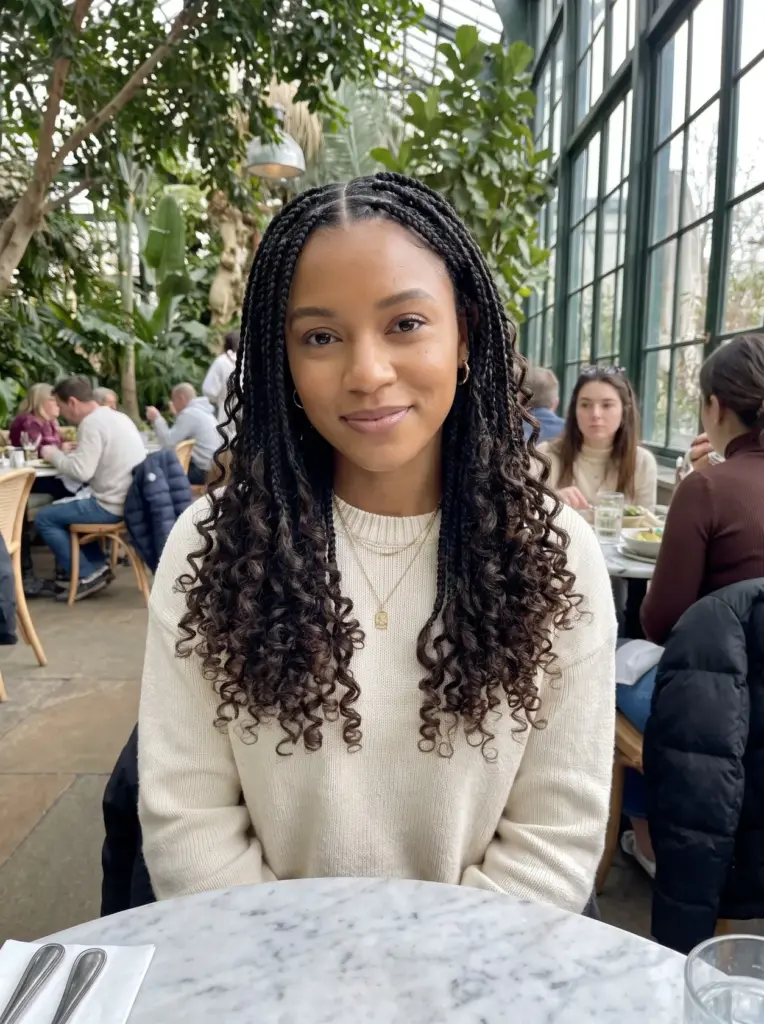
Boho Box Braids With Beads
Curly-ended box braids fall to mid-back with a slightly undone, bohemian finish. Wooden beads and small gold cuffs sit along a few face-framing strands of this look, shown in a warm medium brown blend. Leaving curls loose along each braid adds volume, and a satin scarf at night keeps those curly pieces from tangling.
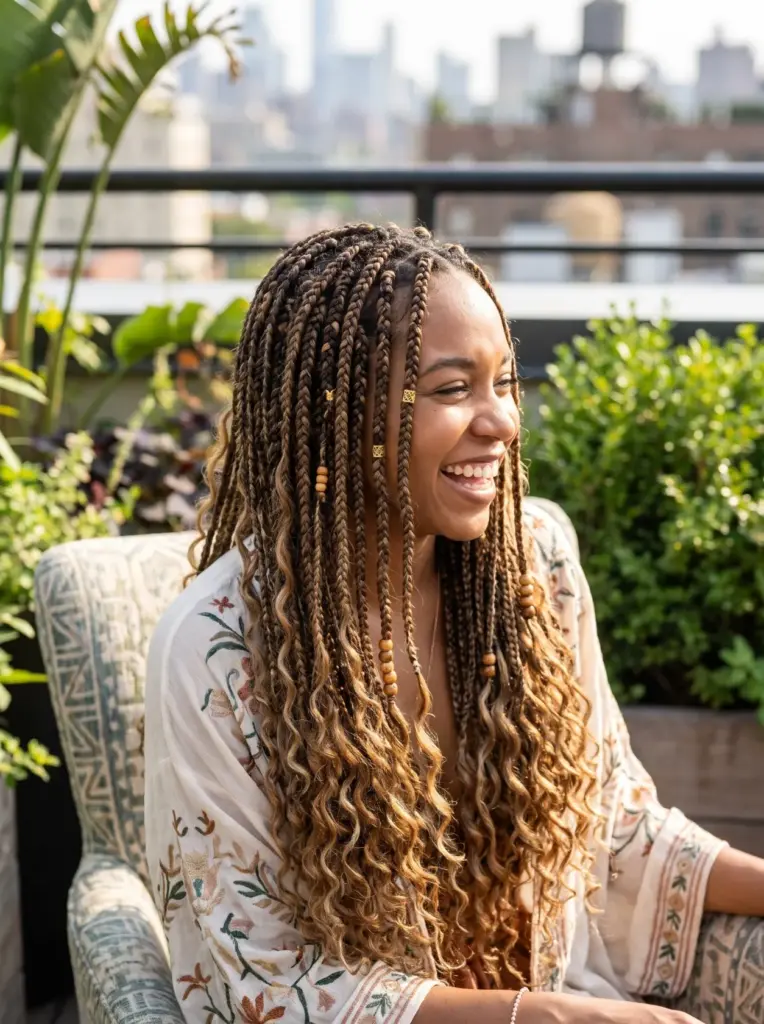
Spring Twists For Lightweight Volume
Ringlets coil from root to tip, each twist light and bouncy and falling just past the shoulders. Pre-curled hair makes this look quick to install, shown in a deep burgundy.
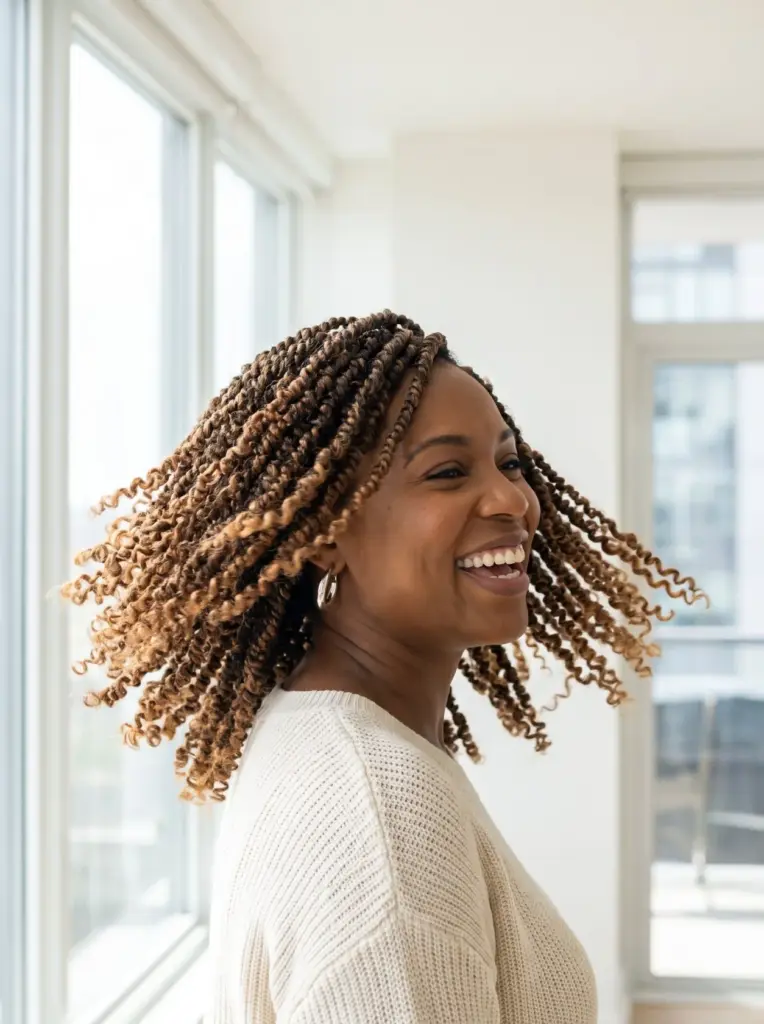
Tribal Braids With Beaded Accents
Geometric lines curve across the scalp in bold, symmetrical rows, decorated with painted beads and metal cuffs along each raised part. This look flows into loose braids past the shoulders in jet black. Ask for a mix of cornrows and box braids at the back, and keep beads lightweight so they don’t pull on the edges.

Halo Braid For Natural Hair
One thick braid wraps around the crown like a halo, with a smooth, glossy front hairline and a few wispy pieces curled at the temples. this style looks delicate but holds through an active day, pictured in a deep brown. Stretched or blown-out hair makes braiding easier, and pins tucked along the braid secure the wrap.

Crochet Braids For Instant Curls
Dense, bouncy ringlets burst from the scalp, tightly defined at the roots and lighter toward the ends. This look gives a full, curly shape in a natural black with a hint of auburn. Installation takes around two hours over cornrows, and the curls can be fluffed with fingers instead of combed.
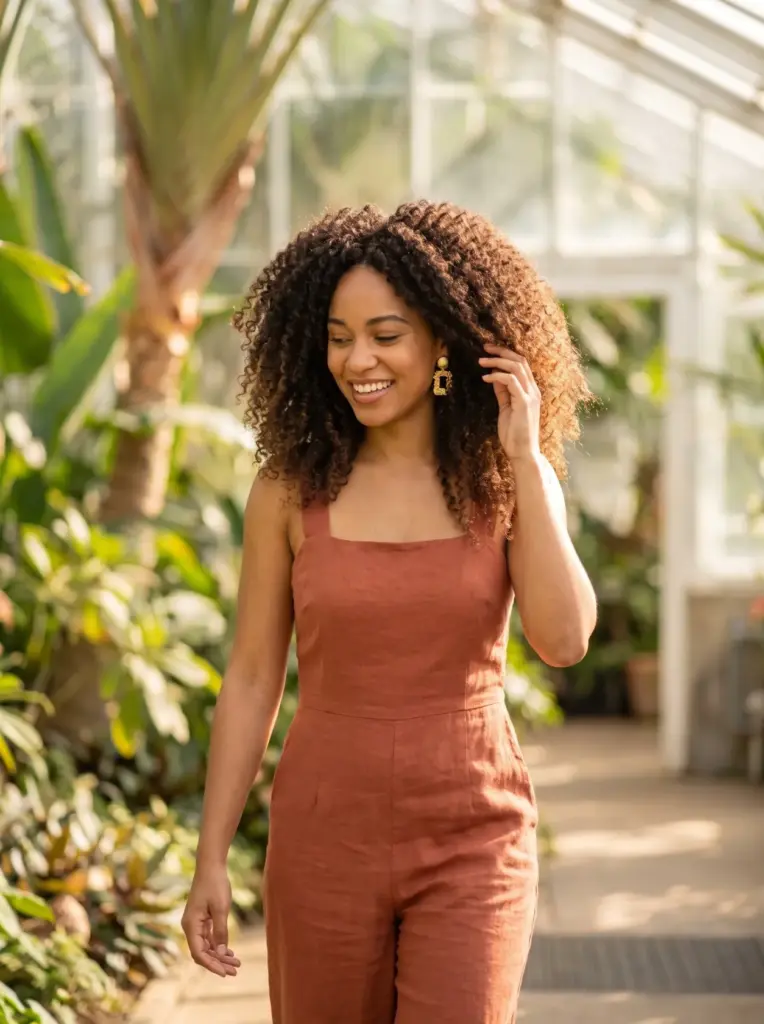
Feed-In Braids With Sleek Parts
Fine roots taper into thicker, even braids that fall past the shoulders, with sleek, straight parts running front to back. This look sits flat against the scalp in jet black, looking light and dense at once.
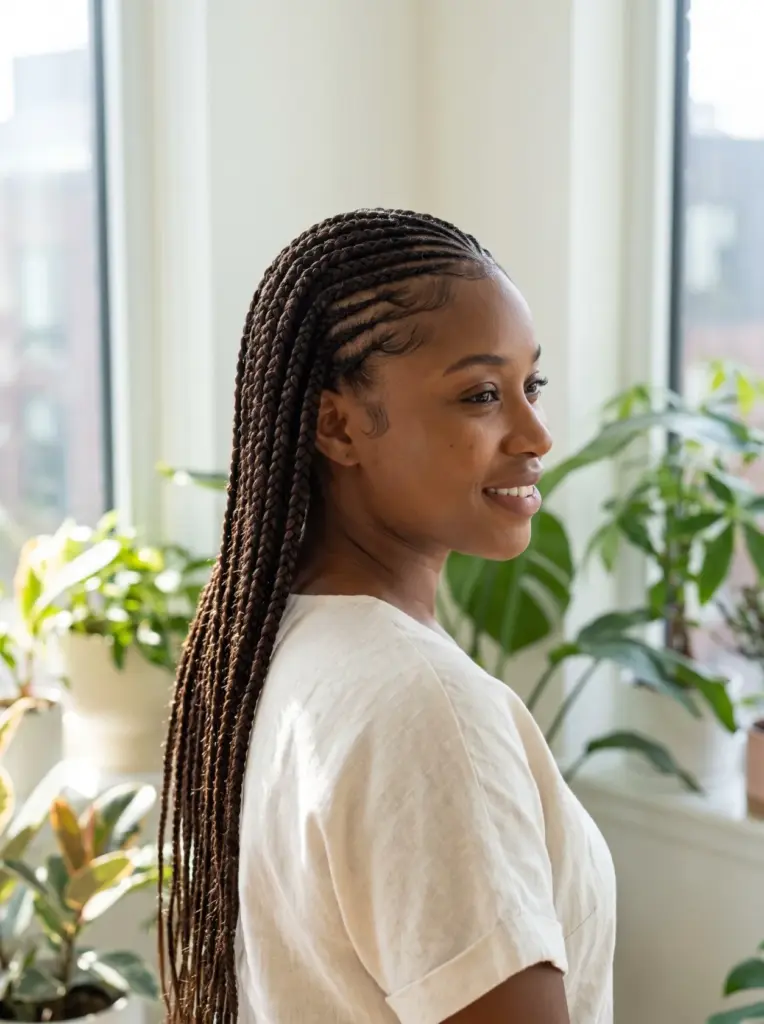
Mini Twists For Everyday Wear
Small, uniform twists cover the head in defined rows from a precise part, each one glossy and slightly curled at the tip. This look graze the shoulders with gentle movement, shown in a dark espresso brown. Low-maintenance and versatile, they usually last 4–6 weeks with a light oil on the scalp, but come out sooner if tension or build-up shows.
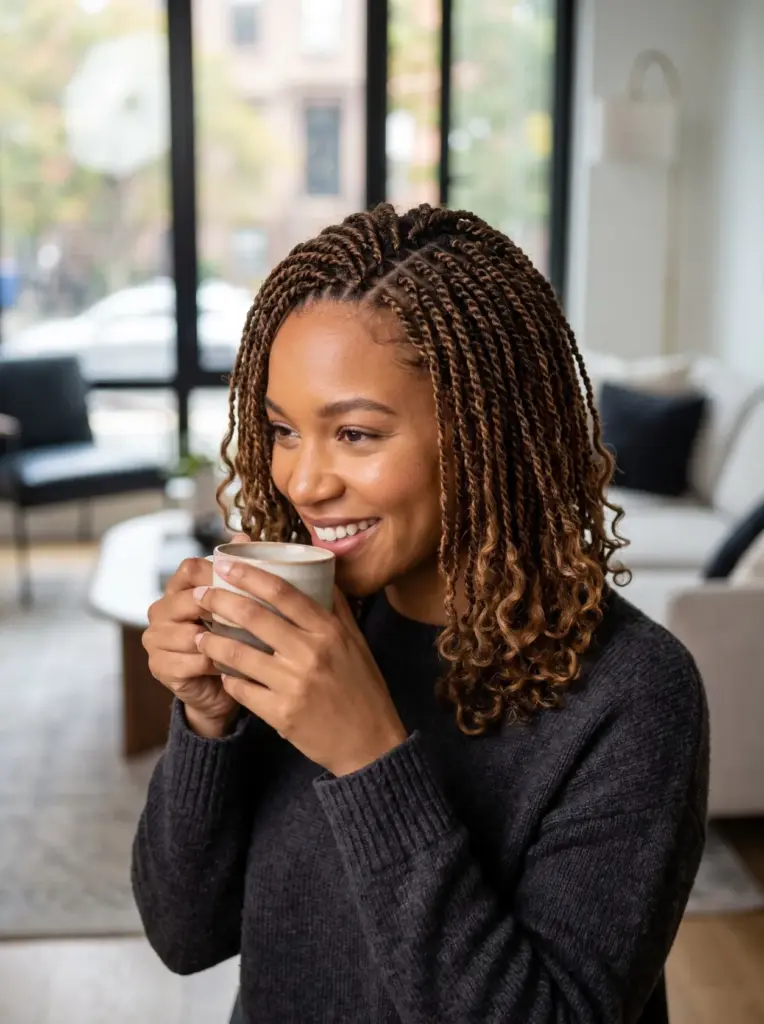
Marley Twists For Bold Texture
Thick coils build serious volume from root to tip, with a coarse, kinky finish that mimics 4C hair. This look taper slightly toward curled ends near the collarbone, shown in a deep brown. Kinky hair grips the twists well, and if the hair is synthetic or heat-safe, a dip of just the ends in hot, not boiling, water seals them.
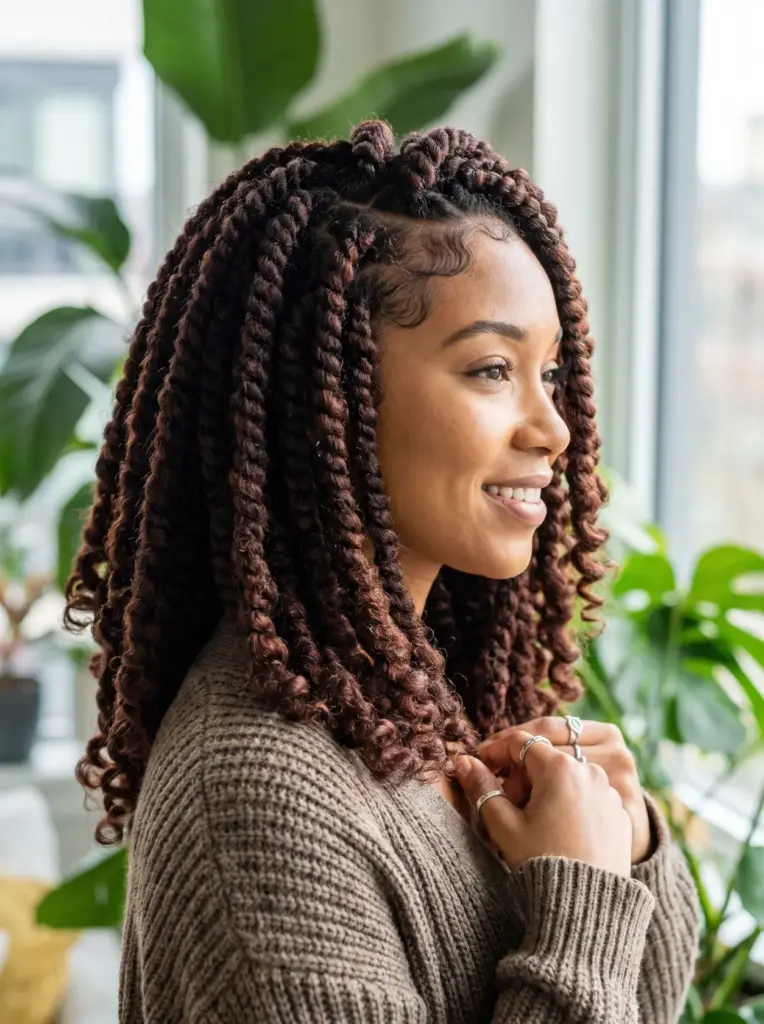
Jumbo Box Braids For Statement Length
Oversized braids stretch to waist length in thick sections, each one smooth, glossy, and evenly spaced from a clean center part. This look install faster than smaller braids, pictured here in jet black. Their weight can strain the edges, so keep the braids loose at the root and tie them up while sleeping.
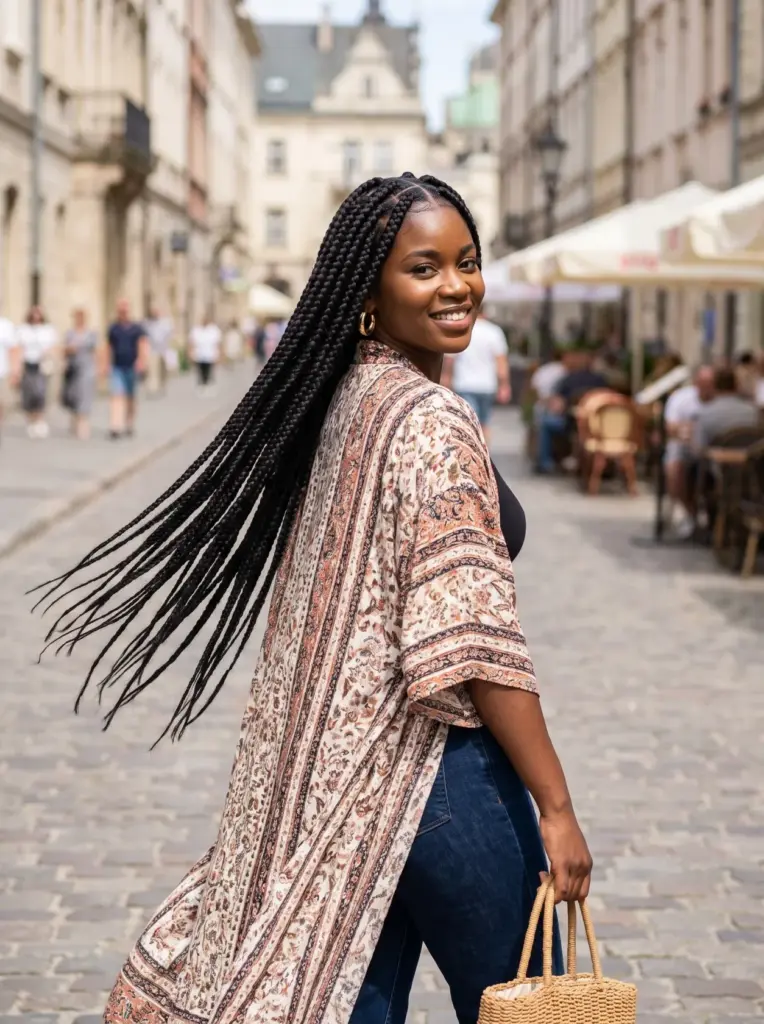
Butterfly Locs With Wispy Ends
Distressed and slightly frizzy along their full length, these locs finish in wispy curls that flutter around the face and shoulders. This look comes in a warm medium brown with darker roots. Mid-back length is easiest to manage, and a light mousse keeps the loops looking intentional rather than unkempt.
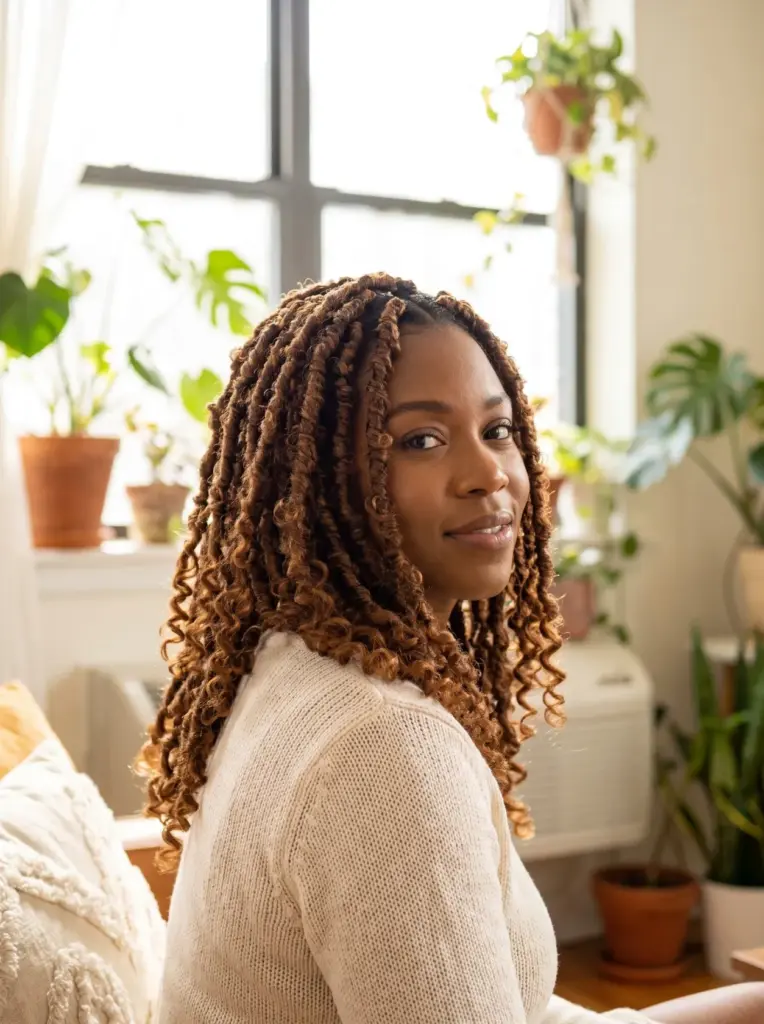
Braided High Ponytail Natural Hair
Cornrows gather smoothly into a high ponytail at the crown, with a laid hairline and baby hairs curled at the temples and edges. This look works for errands and nights out, shown in jet black with a long braided tail. Avoid pulling the edges too tight, and wrap a braid around the elastic to hide it.
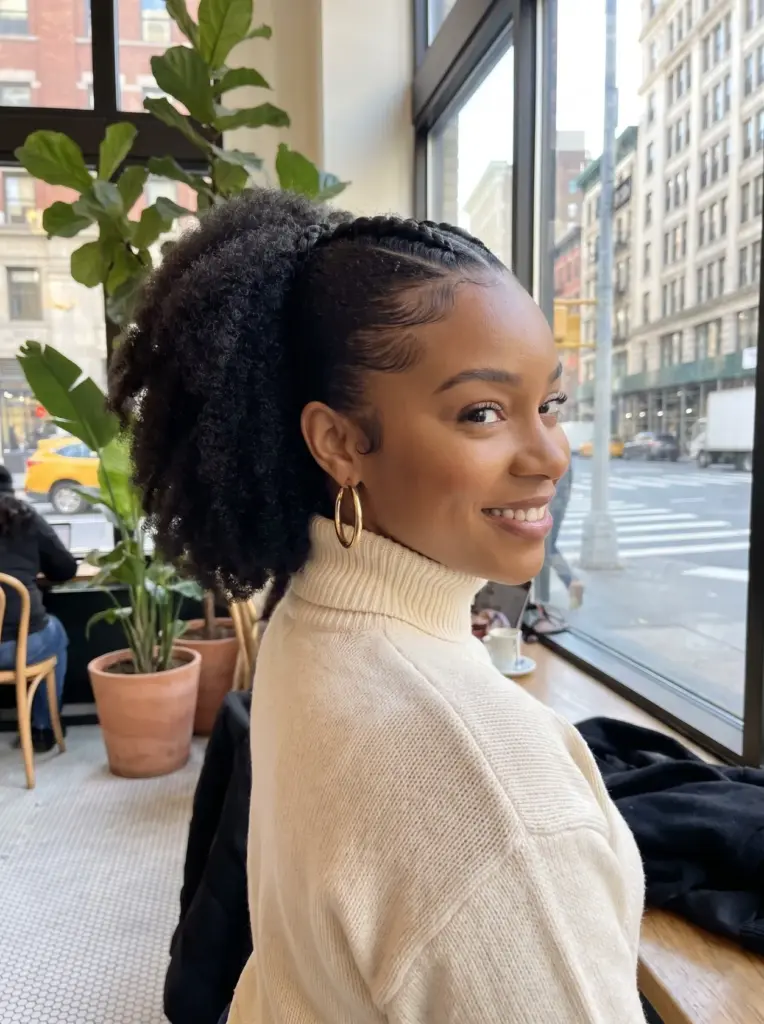
Cornrows Swept Into A Side Bun
Diagonal rows sweep across the scalp and gather into a rounded, glossy bun at one side, with loose tendrils curled near the ear. This look gives a protective style an asymmetrical twist in a dark chocolate shade. Side-swept rows help balance round faces, and a mesh bun shaper adds fullness if natural length is short.
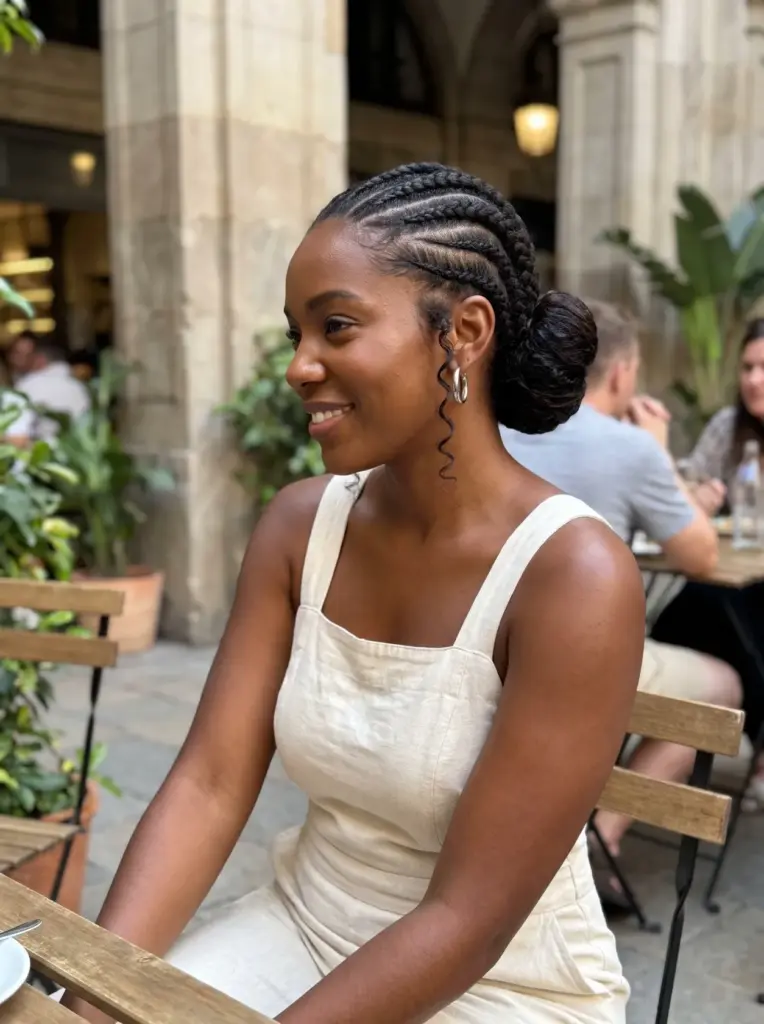
Twisted Updo For Natural Hair
Chunky twists are gathered and pinned into a voluminous updo at the crown, with a few loose pieces framing the face and neckline. This look has rounded fullness on top and is shown in a soft black. Pin the twists in sections with U-pins, and refresh them with a leave-in spray to recreate the style at home in minutes.

Beaded Cornrows For Playful Detail
Neat, symmetrical rows trace across the scalp from a crisp part, ending in colorful beads that sway near the shoulders. This look mix bright beads with jet-black braids for a fun, summery look. Secure each bead with a small elastic or foil wrap, and choose lighter acrylic beads to reduce pull on the edges.
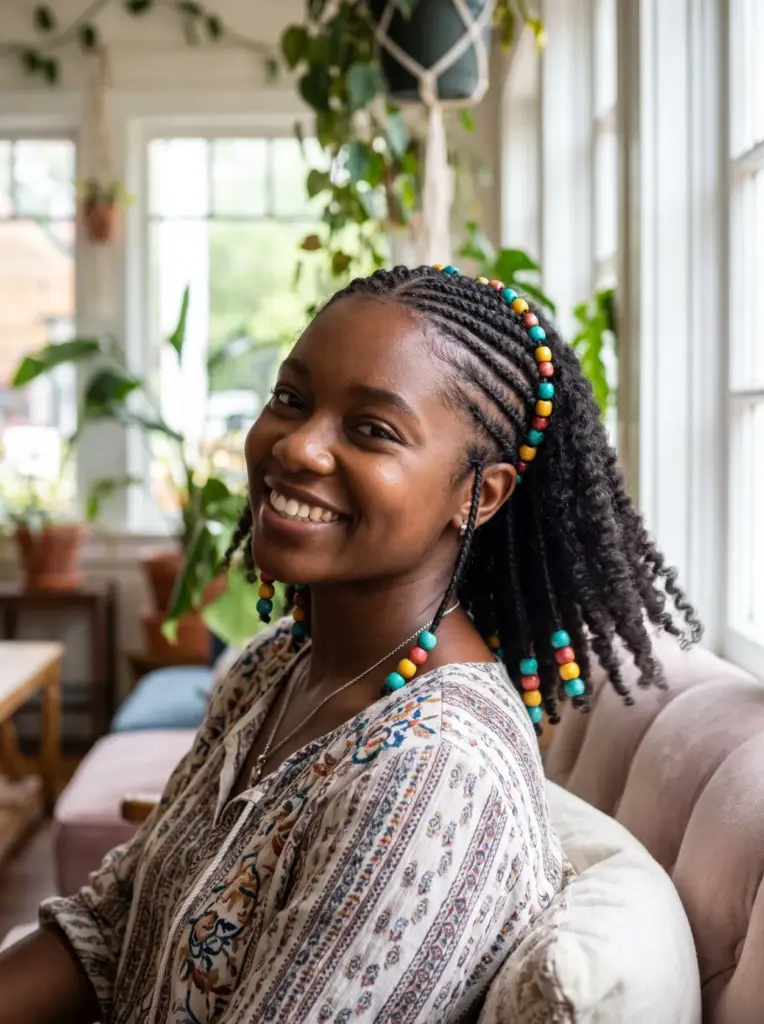
Flat Twist Updo For Natural Hair
Smooth flat twists follow curved rows back from the hairline and gather into a rounded updo at the crown. Loose twists frame the temples in this look, shown in a deep brown. It works on the wearer’s own hair with no extensions, and a twisting butter keeps the rows defined for a week or two.
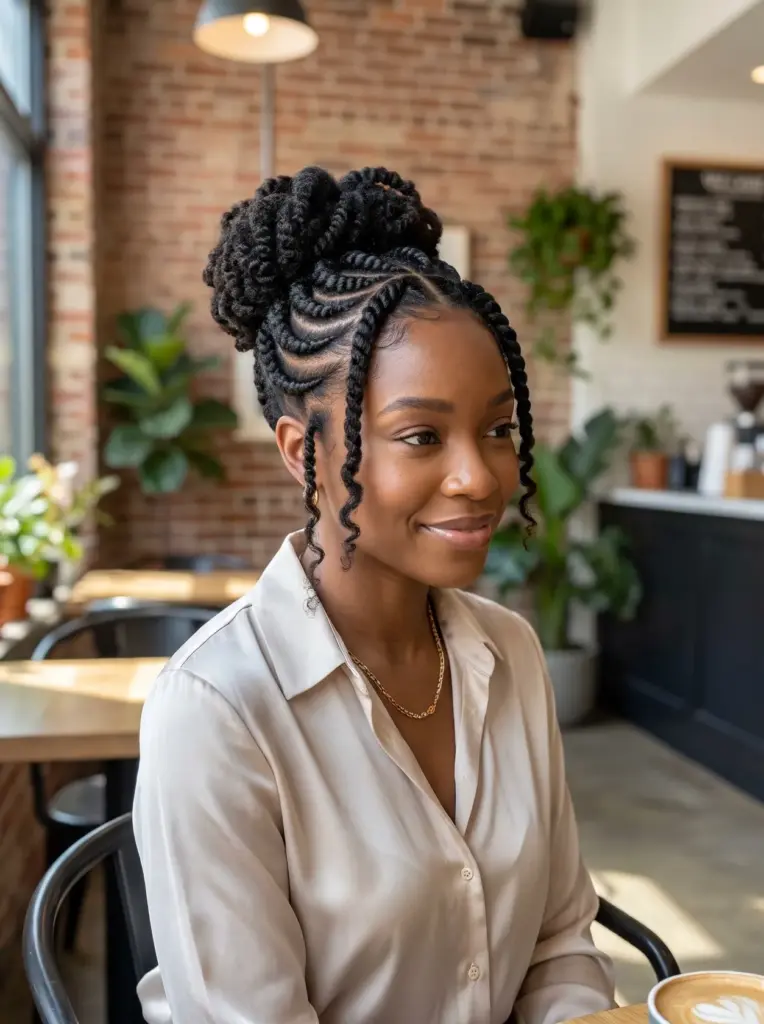
Braided Bob For Short Natural Hair
Chin-length braids form a rounded bob that skims the jawline, each one slightly curled at the tip. Face-framing pieces sit loose near the cheekbones and forehead in this look, shown in jet black.
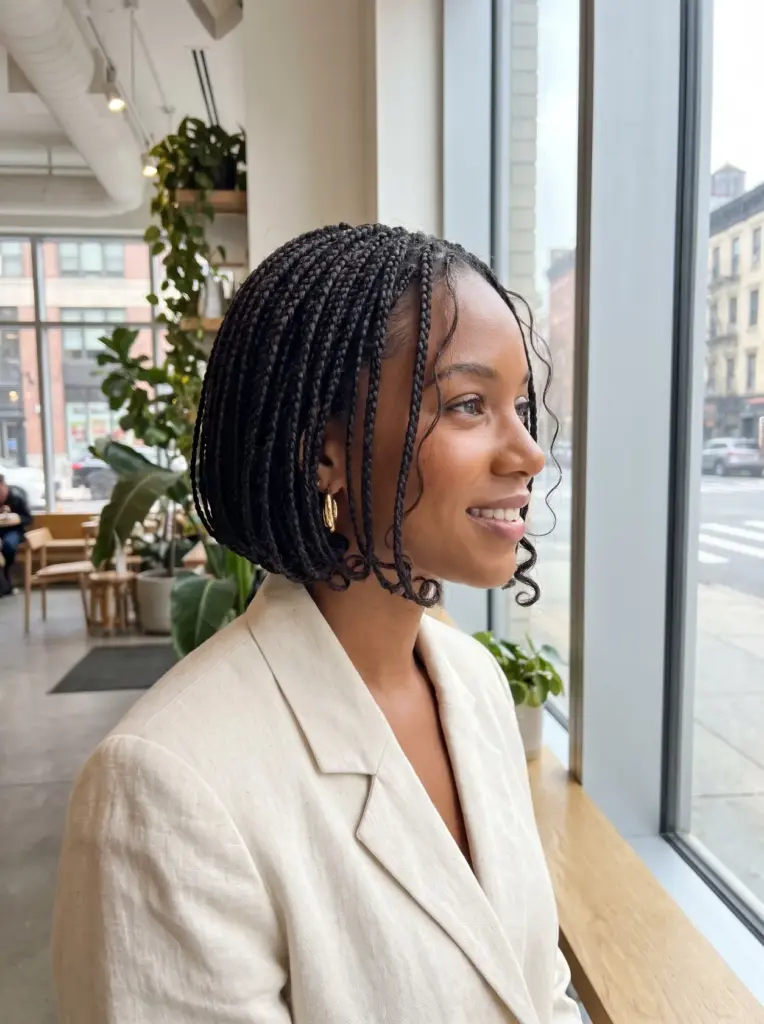
For a useful comparison, read winter protective hairstyles alongside cornrows for natural hair. These examples show other ways to approach the style, with different lengths or techniques.
Styling and upkeep
Looking after a protective style is mostly about moisture and the scalp. Wash the scalp every one to two weeks with a diluted shampoo worked between the braids or twists, and rinse well so product does not build up underneath. While the hair is still a little damp, work a leave-in conditioner and a light oil along the lengths. Cover the style with a silk or satin scarf at night so the edges do not rub against the pillow, and keep the style out of the way of anything that snags it.
Watch the edges and the roots while the style is in. If an area feels sore, itchy or tight, loosen it or take the style out rather than waiting for it to settle. When it is time to remove the style, undo it slowly, section by section, detangle gently and wash the hair before installing anything new. Give the hair a short break between installs: a wash, a deep condition and a few days loose will do more for its health than going straight into the next set.
Frequently asked questions
How long can I keep a protective style in?
Most styles are best kept in for four to six weeks. Shorter, lighter styles sometimes last a little longer, but a style that is itchy, sore or hard to wash properly has been in long enough. Take it out, wash and deep-condition the hair, and give it a break before the next install.
Are protective styles safe for the hairline?
They can be, as long as the tension is comfortable and the style is not too heavy. Pain, bumps or a pulling feeling at the hairline are warning signs: ask the braider to loosen that section or take the style out. Repeated tight styles at the edges are a common cause of thinning there.
Can I wash my hair with braids in?
Yes, though it works best with a diluted shampoo worked into the scalp between the braids and a good rinse afterwards. Wash every one to two weeks and let the style dry fully, since damp braids that stay wet underneath can itch and smell. A hooded dryer or low-heat diffuser helps on wash day.
Should I install protective styles myself or see a braider?
Simple styles like two-strand twists, flat twists and a low bun are easy to do at home. Anything with added hair, long box braids or locs is best left to a professional braider, who will section the hair evenly and keep the tension safe. A professional install also lasts longer and is easier to take out.
How do I take a protective style out?
Slowly, section by section, and with plenty of patience. Undo each braid or twist, detangle with your fingers as you go, and do not pull through tangles. Once it is all out, wash the hair and deep-condition before you install anything new.
A protective style is a rest for your hair, not a test of how much it can take. Choose a style that feels comfortable from the first day, keep it in for four to six weeks at most, and moisturise and wash it properly while it is in. Save two or three photos that match your hair and the amount of time you are willing to spend on upkeep, and talk them through with your braider — including the weight, the length and how the style will come out. If the style still feels comfortable at the end of its life and the hair underneath looks healthy, it did its job.