A quick hairstyle should be realistic for the hair you have that morning. A high puff or headband afro can take minutes on detangled natural hair, and a twist-out refresh is fast when the twists were set the night before and have dried fully. The point is not to start from a wash every day — it is to keep a style that holds from one day to the next and to know which five minutes will fix it. A good morning routine means the hair was prepared the night before, with the ends protected and the shape loosely gathered under a satin bonnet. Installing braids or crochet hair is a different job, so the time estimates in this list apply to daily styling and restyling rather than a fresh install.
These 25 quick hairstyles for Black women include easy natural-hair looks, low-tension puffs, short-crop options, and fast ways to restyle existing braids or crochet curls. The time depends on detangling, length, density and whether an existing style is being refreshed. The quicker options assume the hair is already prepared. If you need longer-lasting styles for cold weather, browse our winter protective hairstyles instead.
Before you start: make the morning easier
Detangle gently when appropriate for your texture and style, and keep a soft scrunchie, a few smooth clips, and a water-based refresh product nearby. Don’t soak a finished twist-out if you want to preserve its definition. For styles that pull hair back, use only enough tension to hold the shape; tight edges and sore roots are signs to loosen the style.
What counts as a five-to-fifteen-minute hairstyle?
A puff, simple bun, headband, or small front twist can fit that window when the hair is already ready to style. A fresh wash-and-go may need drying time, and a full twist-out needs preparation before the morning. Installed braids and crochet hair are included only as quick restyling options.
1. Five-Minute High Puff
View Instagram post by @luxadicurls
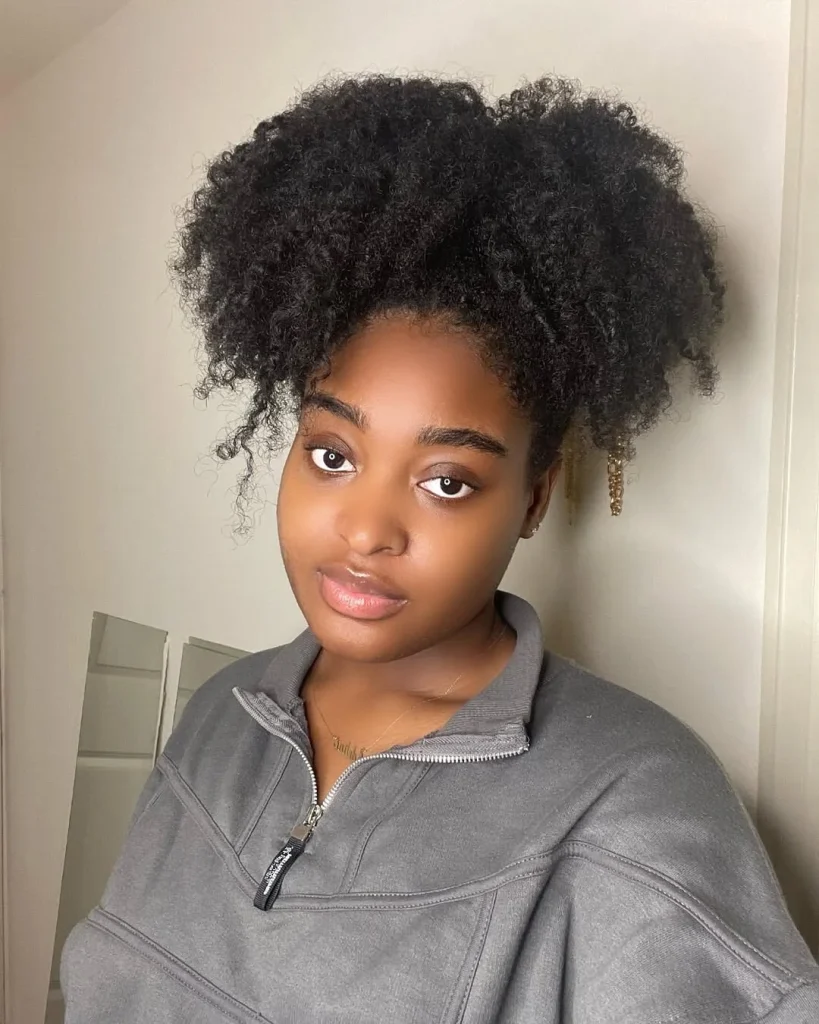
Start with detangled, stretched or already defined natural hair. Smooth the sides gently with your hands, then use a soft, adjustable puff band to gather the hair toward the crown. Stop tightening when the band feels secure; pulling too hard can stress the hairline. Fluff the ends with your fingers and leave the texture visible. This is fastest on hair that is already moisturized and ready to style.
2. Low Puff With a Side Part
View Instagram post by @olovesuuu
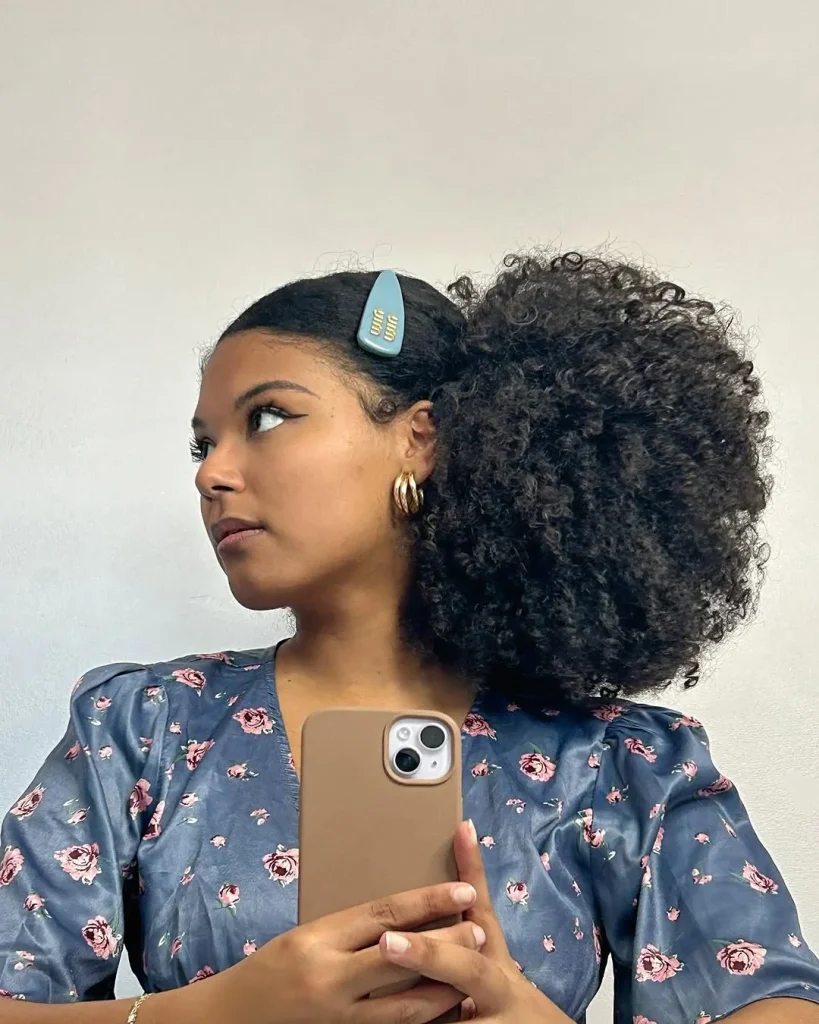
Create a side part, smooth the front with a little water-based styling product, and gather the hair into a low puff using a covered band. Leave the ends full instead of trying to brush out every curl. If the hair is short, use a wider soft band to gather the sides gently. Avoid repeated tight brushing around the edges.
3. Quick Sleek Low Bun
View Instagram post by @bubualabi_
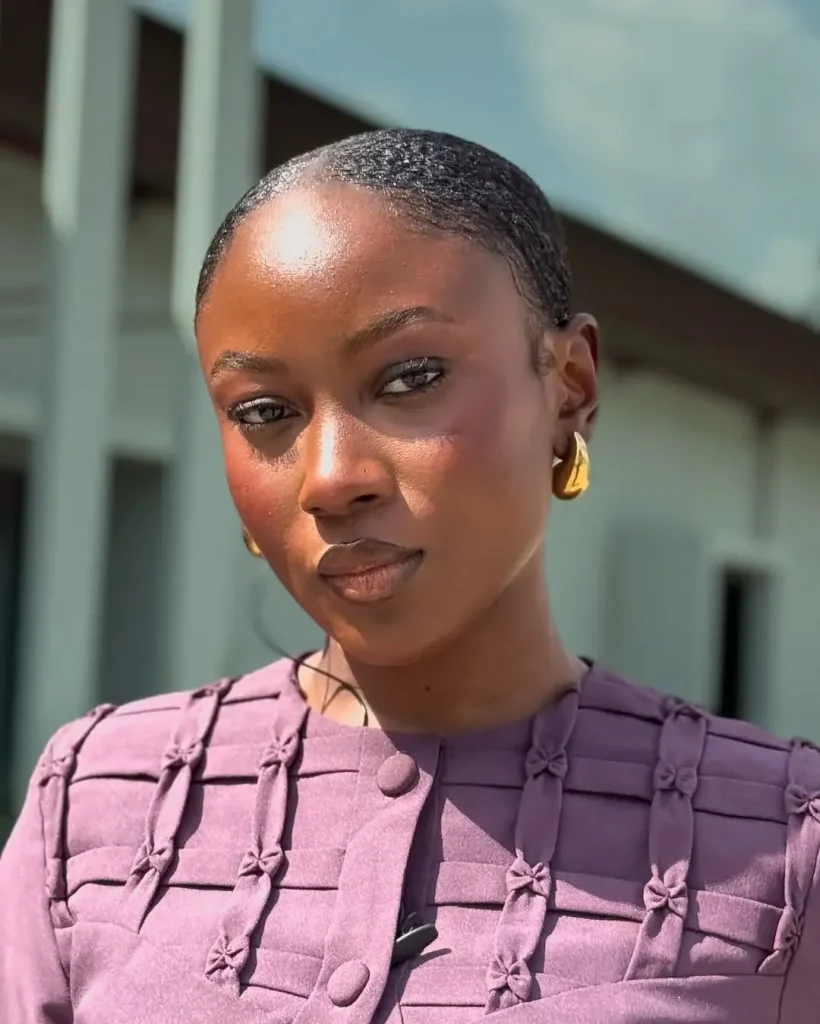
On hair long enough to reach the nape, create a center or side part and gather it with a soft elastic. Twist the ponytail into a small bun and secure it with pins. A little gel on the surface can smooth flyaways, but don’t pull tightly at the temples. This can take five to ten minutes when the hair is already detangled; shorter hair may need a low puff instead.
4. Loose Pineapple Updo
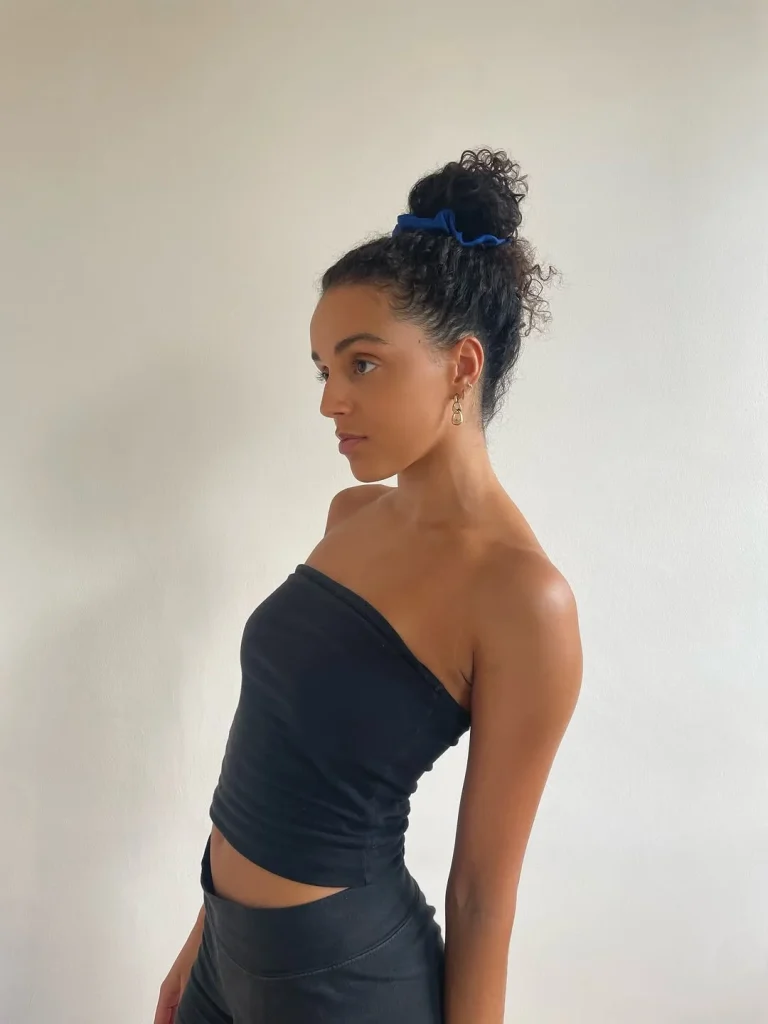
View Instagram post by @ilihaircare
Gather longer curls loosely at the very top of the head with a satin scrunchie, letting the ends fall forward. Keep the tie soft enough to avoid stretching the curls. This works well for an informal morning or a quick errand. For shorter natural hair, make a small high puff rather than forcing every section into the pineapple.
5. Two Low Puffs
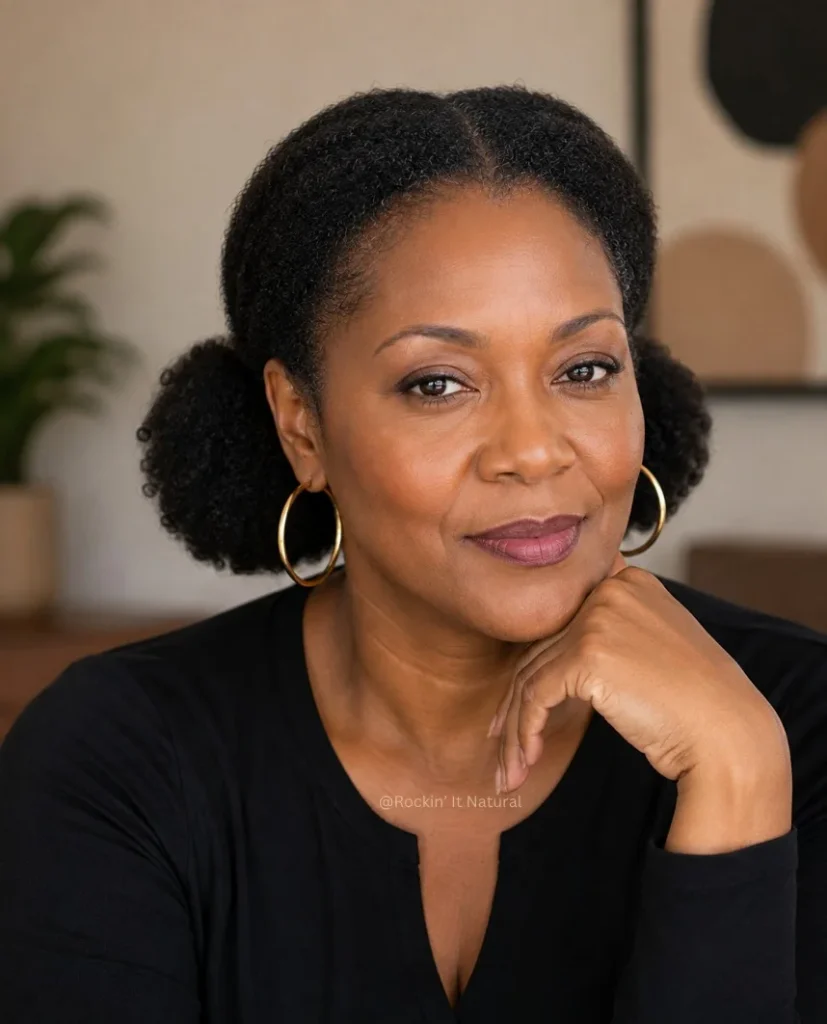
View Instagram post by @rockinitnatural
Part the hair down the middle and gather each side into a low puff behind the ears. Use soft covered elastics and leave the curls fluffy. This is a practical choice for medium-length natural hair and can be finished quickly once the part is made. If the sides are short, don’t pull them excessively to meet the elastic.
6. Half-Up Half-Down Natural Curls

View Instagram post by @naturallynoreen
Separate the crown section from the lower hair and secure the top into a loose puff. Refresh the lower curls with a little water or leave-in product and finger-shape any flattened pieces. The style works on hair that already has a defined curl pattern or twist-out. Keep the top elastic gentle so the front hairline isn’t under tension.
7. Side-Part Wash-and-Go Refresh

View Instagram post by @naptural85
For a wash-and-go that’s already dry and defined, mist the flattened areas lightly with water and work in a small amount of leave-in or gel. Make a fresh side part and shape the curls with your fingers. This is a refresh, not a complete wash-and-go from wet hair. See our wash-and-go hairstyle guide for full preparation ideas.
8. Claw-Clip Twist on Stretched Hair
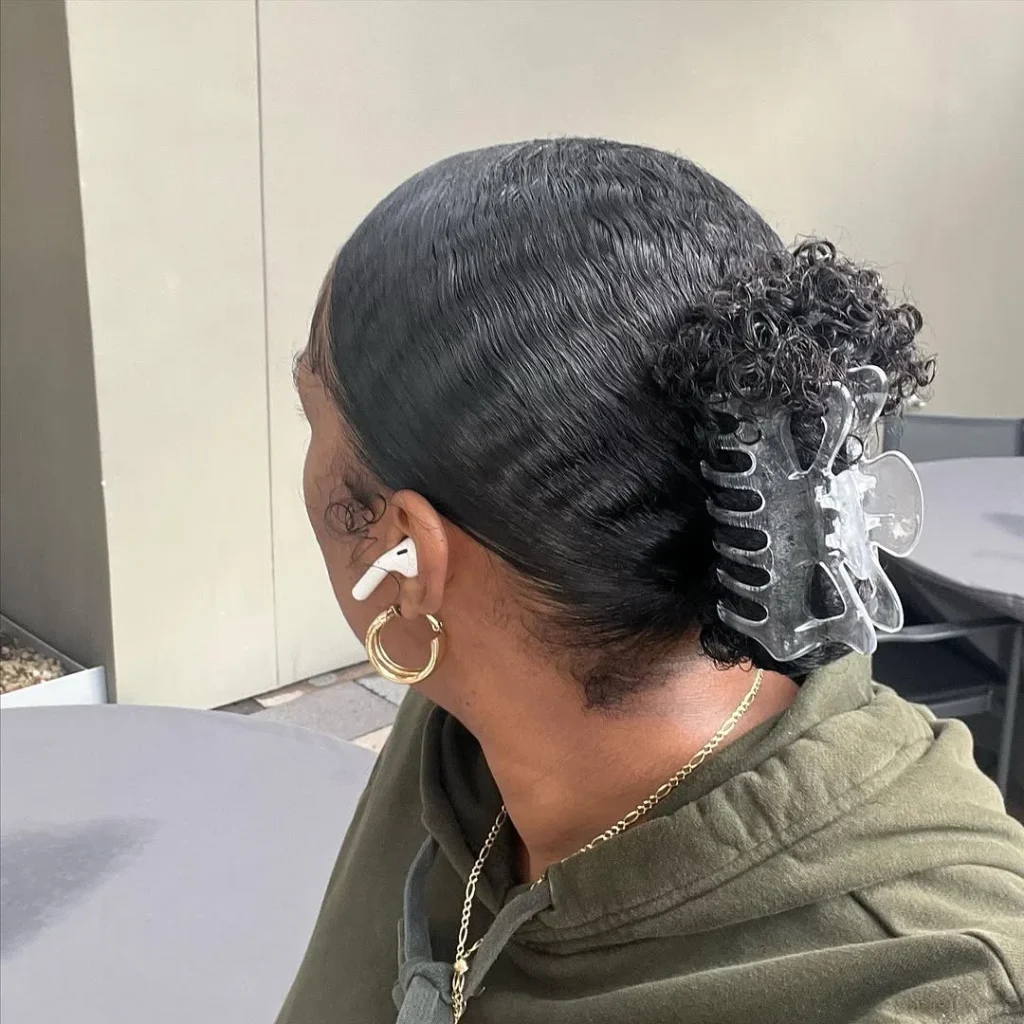
View Instagram post by @teaonchanae
Gather stretched medium-length hair at the nape, twist it upward, and secure it with a sturdy claw clip. Leave the ends loose or tuck them under the clip. Choose a clip large enough to hold without pulling. This can be a quick workday style when the hair is already detangled; very thick hair may need two smaller clips or a larger clasp.
9. Headband Afro
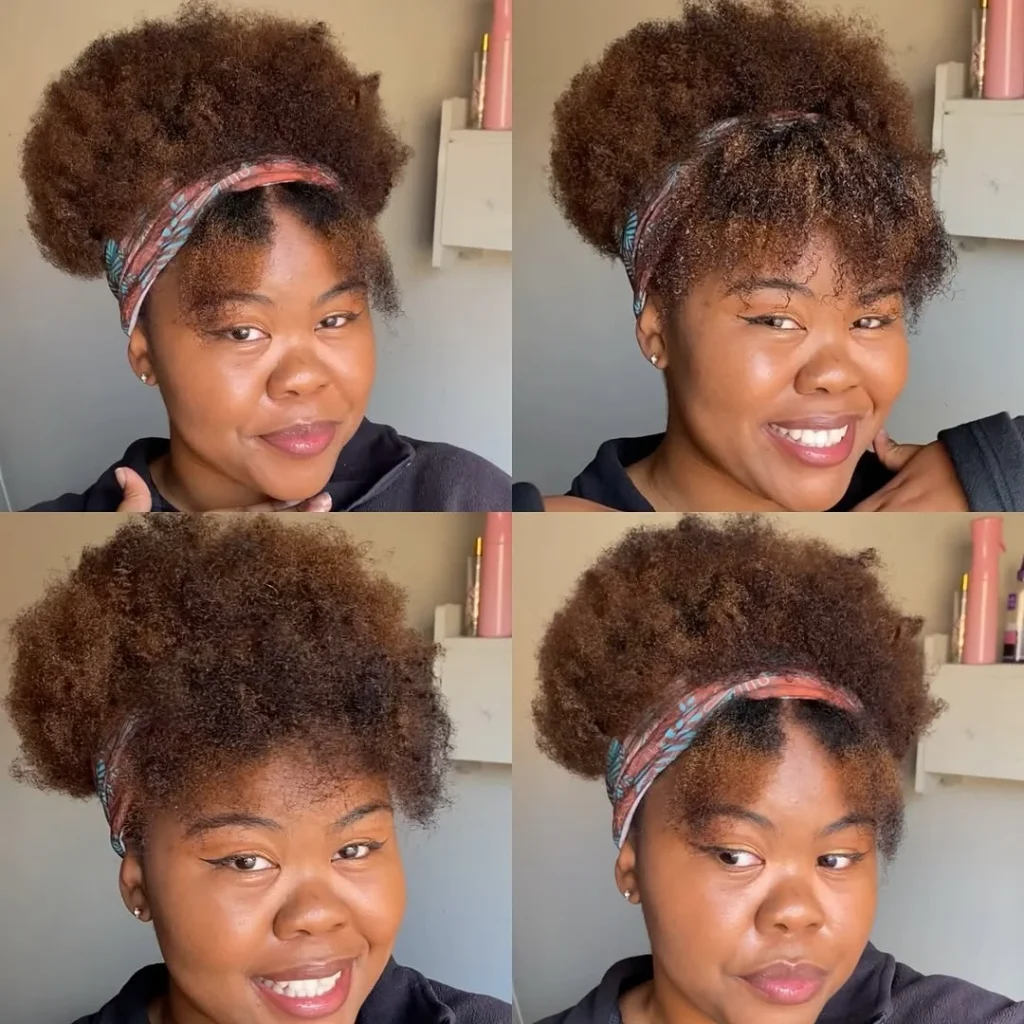
View Instagram post by @paz_neigh
Shape an existing afro with your fingers or a pick, then slip a comfortable fabric headband behind the hairline. Leave the volume visible instead of flattening it under a tight band. This takes only a few minutes and doesn’t require heat or braiding. Choose a band that stays in place without rubbing at the edges.
10. Scarf-Tied Low Puff

View Instagram post by @naturalblackgirliee_
Gather natural hair into a soft low puff, then tie a lightweight scarf around the base or over the headband. Knot the scarf gently and tuck the ends away from the face. The scarf decorates an already secured style rather than holding all the tension. This works especially well on a rushed morning when the front needs a tidy finish.
11. Flat Front Twists With Loose Back
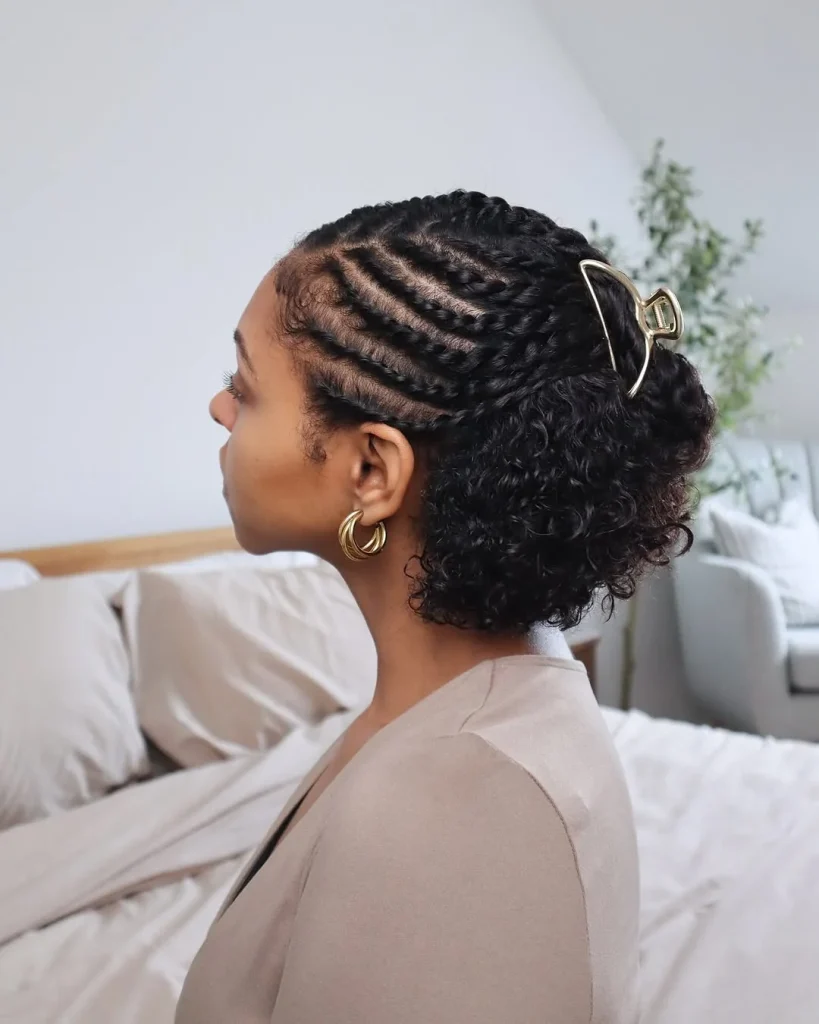
View Instagram post by @shanicecox
Part the front into small sections and flat-twist each one from the hairline back toward the crown, securing the ends with a small grip or claw clip. Leave the back loose so the existing defined curls fall freely. The front detail can take about ten minutes with practice. Avoid twisting tightly at the edges; this is an everyday styling option, not a long-term installed protective style.
12. Mini Front Cornrows With a Loose Puff
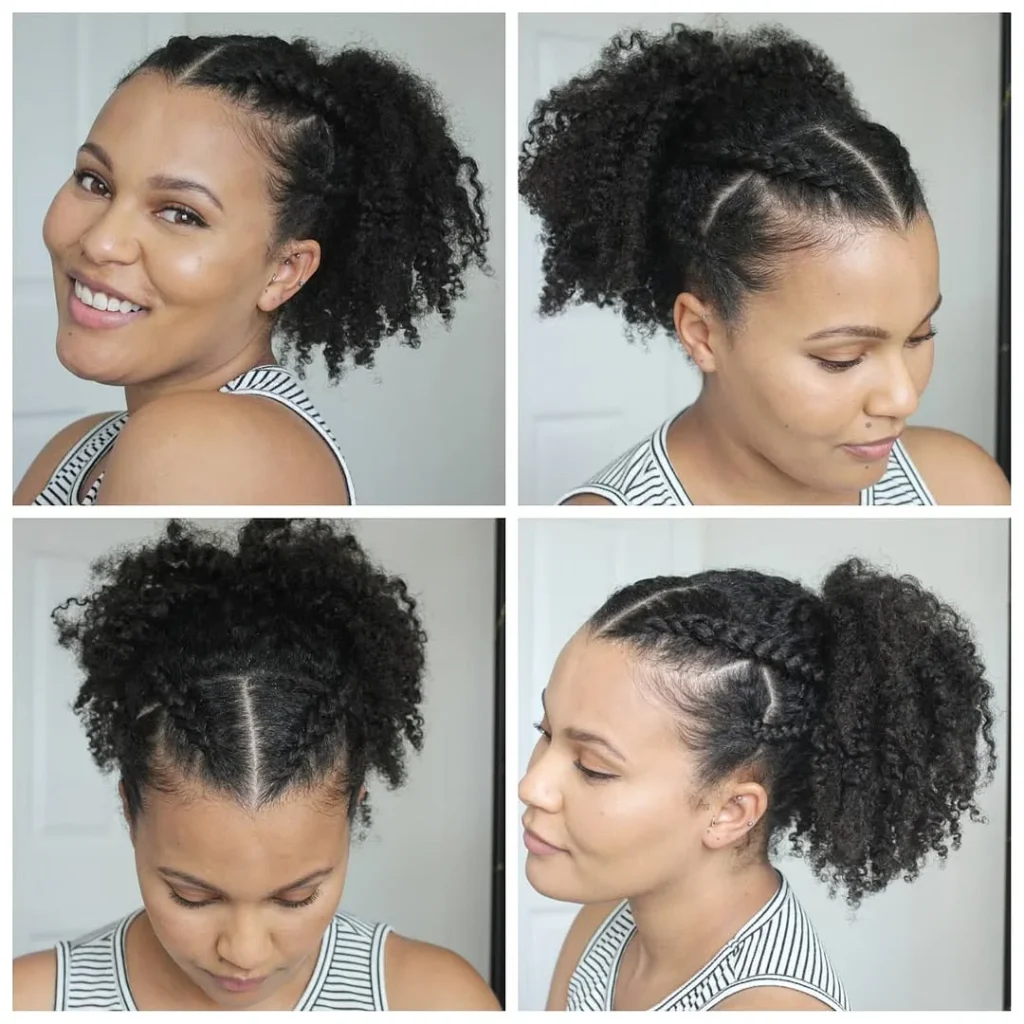
View Instagram post by @_simplystasia
Part the hair down the middle and braid a small braid and a cornrow on each side from the hairline toward the crown, keeping them comfortable at the roots. Gather the rest of the hair into a loose puff and let the curls keep their shape. This is a quick rescue for a twist-out that didn’t set quite right, and it keeps the front neat without pulling the hairline tight.
13. Mini Bantu Knots

View Instagram post by @twostrandsalon
Section the hair into small, neat parts and twist each section into a small bantu knot, securing it close to the scalp. In this salon look the copper-tinted knots sit all over the head in clean triangle parts, and the style can be worn as it is or taken down later for defined curls. Keep the parts neat and the knots comfortable, not pulled tight at the scalp.
14. Sleek Single Top Knot

View Instagram post by @dear_summmer
Gather the hair into a high ponytail, smooth the sides and edges, then twist the length and wrap it into one tall knot at the crown. Secure it without pulling the edges too tightly. This is easiest when the hair is already detangled and has enough length to coil, and it keeps the length up and out of the way in about ten minutes.
15. Quick Twist-Out Fluff and Part

View Instagram post by @amberalauran
If your twists were set the night before and are completely dry, unravel them carefully with a little oil on your fingertips and separate each section only as much as needed. Pick the roots gently for volume and choose a side part. The morning finish can be quick; creating and drying the twists is separate preparation, not included in the time estimate.
16. Defined Braid-Out Refresh
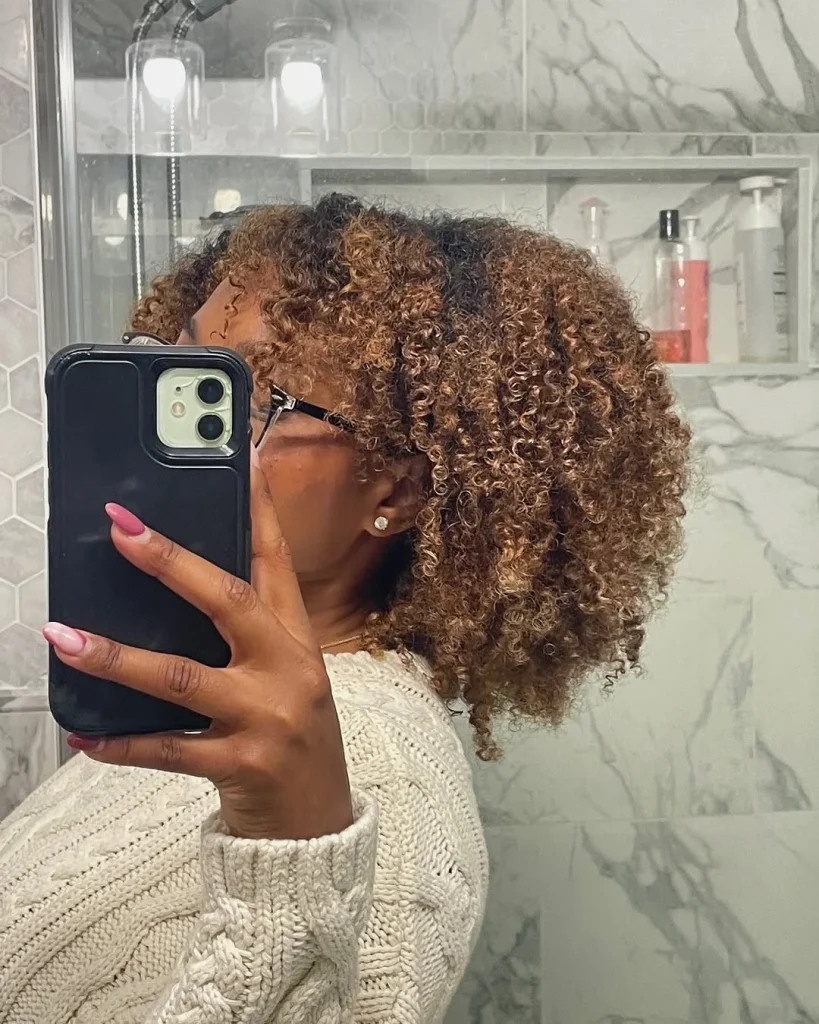
View Instagram post by @itsdaelle
On an existing braid-out, separate flattened sections with your fingers and lightly mist only where needed. A tiny amount of styling cream can help smooth frizz without soaking the pattern. Change the part for a fresh look. The braid-out itself must already be set and dry; starting from freshly washed hair is a longer process.
17. High Puff With an XXL Scrunchie

View Instagram post by @olovesuuu
Gather the hair into a high puff and secure it with a large soft scrunchie, keeping the band comfortable at the hairline. Shape the puff with your fingers and leave the curls full and rounded. This is a five-minute style when the hair is already detangled, and it keeps the length up and out of the way.
18. Short Tapered Cut With Defined Top

View Instagram post by @_ms_lgm_
Refresh the longer curls on a tapered cut with a light mist and finger-coil only the pieces that lost shape overnight. Smooth the shorter sides with your palms rather than brushing them hard. This can be a genuine five-minute style when the haircut is already shaped. A full retwist of every curl would take longer.
19. Short Afro With a Side Part
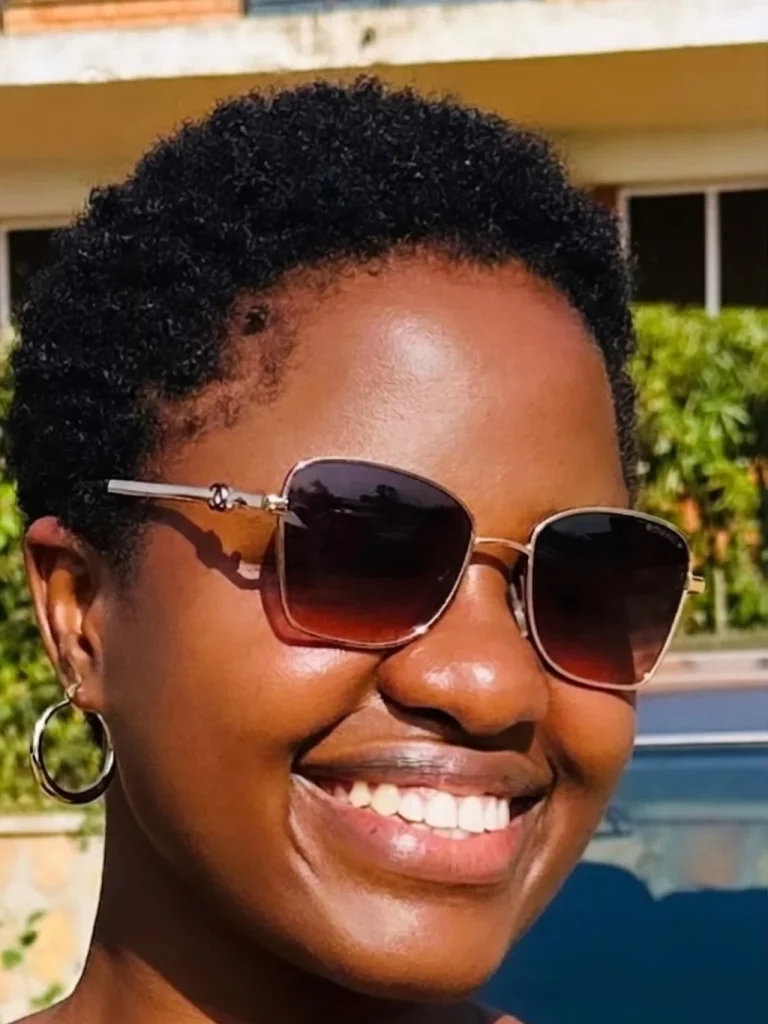
View Instagram post by @chocolate_enyd_
Make a gentle side part in a short afro and fluff the fuller side with your fingers, letting the shorter side lie close to the head. This works even when there isn’t enough length for a ponytail, and a little water and styling cream is enough to refresh it. Keep the part soft rather than scraped tight at the hairline.
20. Satin Scrunchie Curly Ponytail

View Instagram post by @shanicecox
Gather defined curls into a low ponytail using a soft satin scrunchie. Let the ends keep their existing curl pattern. If shorter layers escape, leave them or secure them with one small grip instead of pulling the ponytail tighter. A little water-based refresh around the face is often enough to finish.
21. Side-Swept Curly Bob

View Instagram post by @kenniereneestudios
Make a side part in an existing curly bob and pin the flatter side behind the ear. Refresh only the curls that need reshaping, then let the fuller side fall naturally. This style works on natural curls, twist-outs, or crochet curls that are already installed. A decorative clip can sit over the functional pins.
22. Quick Crochet Curl Refresh
View Instagram post by @slayedbychrissy__
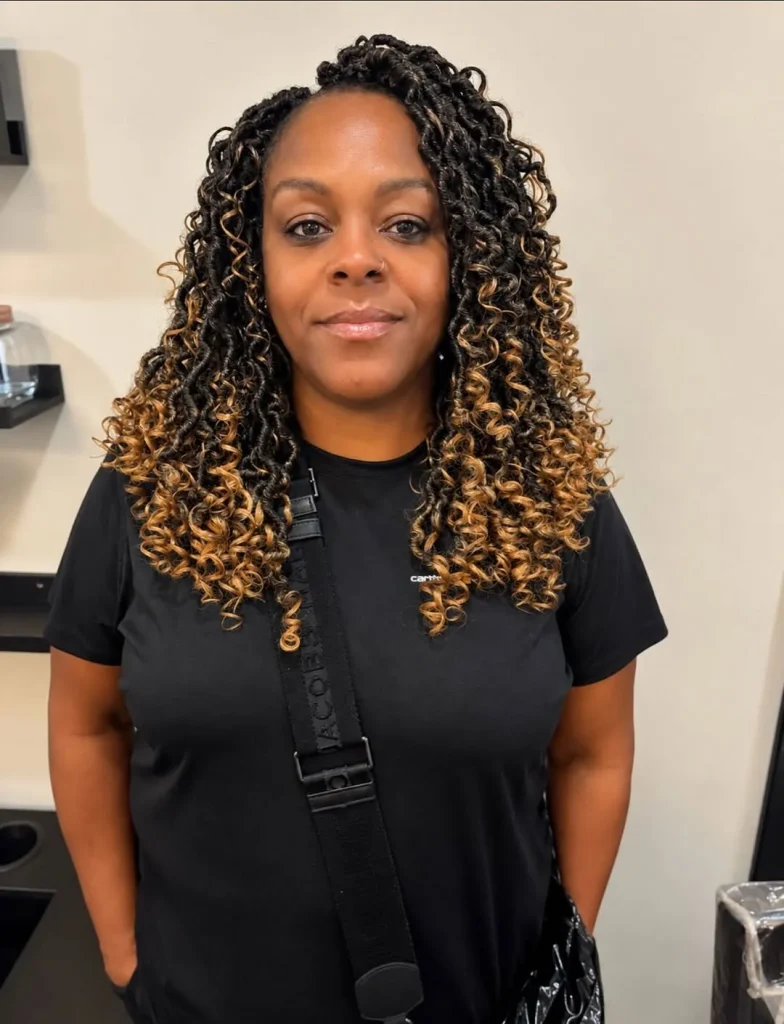
On already installed crochet curls, separate flattened pieces gently with your fingers and use only products recommended for the fiber or hair type. Clip one side back or add a soft headband. Installing crochet hair is not a ten-minute task; this is a quick daily restyle. For inspiration, see our short curly crochet hairstyles.
23. Crochet Half-Up Puff

View Instagram post by @symore.braids
Gather the top section of an already installed crochet style into a loose puff, leaving the lower curls free. Use a soft elastic and avoid pulling on the attachment points. This is a quick way to change the silhouette without reinstalling the hair. If the base feels tight or tender, skip the updo and wear the curls down.
24. Pre-Installed Box Braids Low Bun
View Instagram post by @resemblemebyrobyn
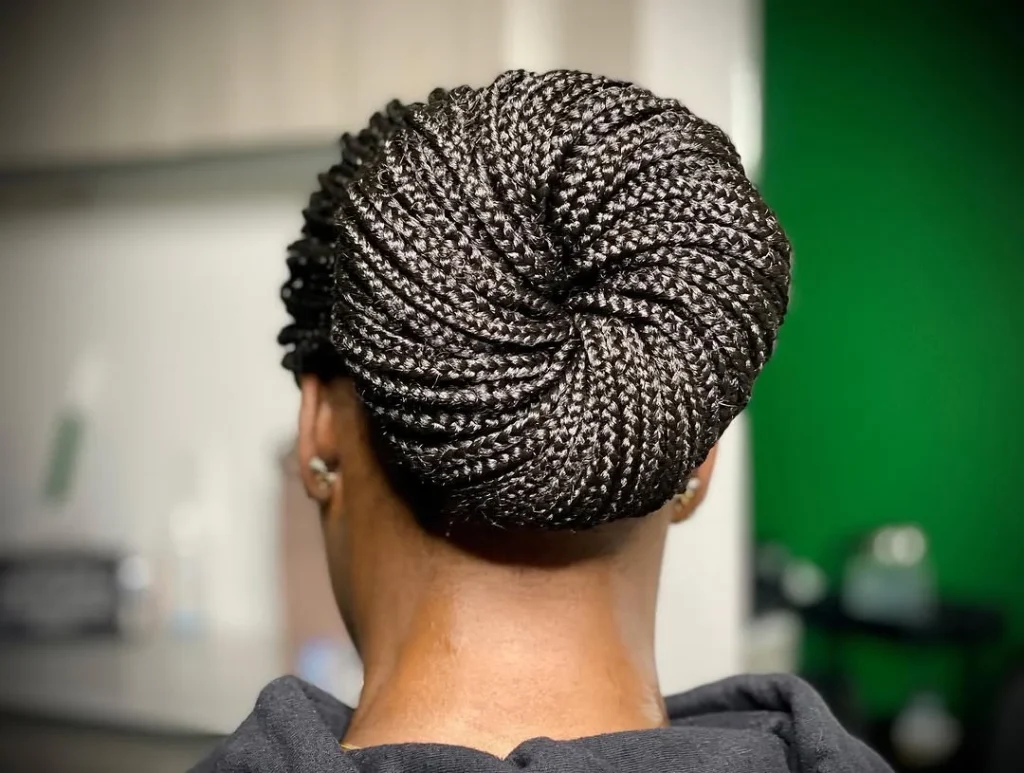
Gather existing box braids at the nape and wrap them into a loose bun, using a large covered elastic or a few pins. Don’t pull the braids tightly at the hairline. The style takes a few minutes once the braids are installed. Installation is a separate appointment and isn’t included in the quick-style claim.
25. Pre-Installed Braids High Ponytail
View Instagram post by @slayedinbraids
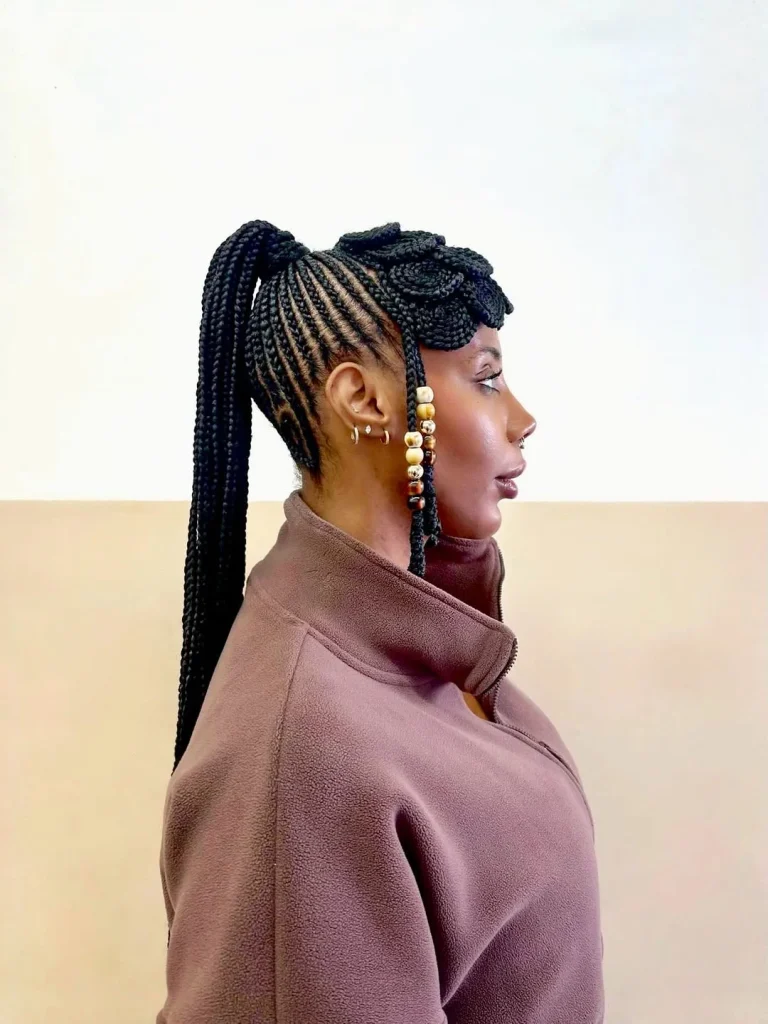
Collect installed braids into a high ponytail with a wide soft band, leaving a few braids loose if you prefer. Keep the ponytail low enough to avoid scalp tension if the braids are heavy. This is an everyday restyle rather than a new protective installation. Take it down if the roots feel sore.
A quick routine that doesn’t strain your edges
Rotate between loose updos and styles that leave the hair down, and avoid repeatedly brushing or pulling the same front sections. Use satin or other smooth accessories when possible. If your scalp feels tender or the hairline is under tension, loosen or remove the style. A gentle nighttime routine can save more morning time than trying to force a complicated hairstyle into five minutes.
Frequently asked questions
What is the fastest natural hairstyle for a busy morning?
A comfortable headband afro, a loose puff, or a simple side part can take only a few minutes when the hair is already detangled and moisturized.
Can a twist-out be done in ten minutes?
Unraveling an overnight set may be quick, but making the twists and allowing them to dry takes additional time.
Are tight puffs protective?
A puff is convenient, but repeated tight pulling can stress the hairline. Keep the band comfortable and change the placement.
Can I style 4C hair quickly?
Yes. Soft puffs, headbands, low-tension twists, and simple clips work with tightly coiled hair. Choose techniques suited to your length and preparation.
Are crochet and box braids quick hairstyles?
Their installation is not quick. Once installed, changing the part, clipping a side, or making a loose ponytail can take a few minutes.